
Anterior Cruciate Ligament (ACL) Reconstruction Surgery
A comprehensive, step-by-step guide to Anterior Cruciate Ligament (ACL) reconstruction surgery
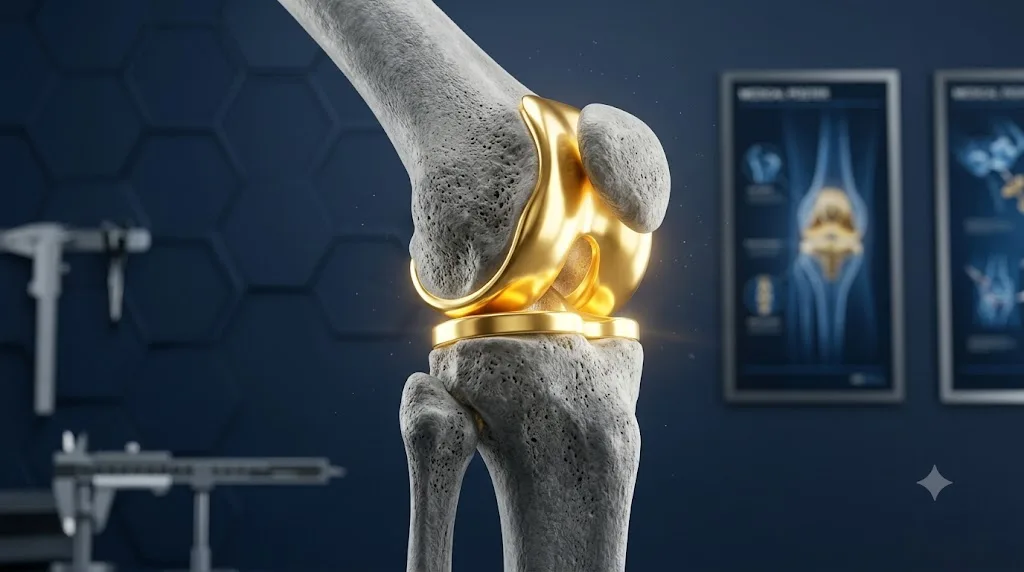
1. Introduction: A Safe Return to Your Peak Days with Dr. Jalil Emad
The anterior cruciate ligament (ACL) is one of the most important pillars of stability in the knee joint. A tear in this ligament, which usually occurs during sports activities, creates a sense of instability, "giving way" of the joint, and severe restriction in rapid movements.
My goal, Dr. Jalil Emad, in treating you is not just to relieve pain or repair a tissue; rather, the primary goal is to return you to the highest level of quality of life, sports, and daily activities. By utilizing the most precise modern surgical techniques in the world and accompanying you step-by-step during your recovery period, I ensure that you navigate the path to recovery with the highest degree of safety and success.

2. Surgical Stages with Dr. Jalil Emad: Precision, Elegance, and Innovative Techniques
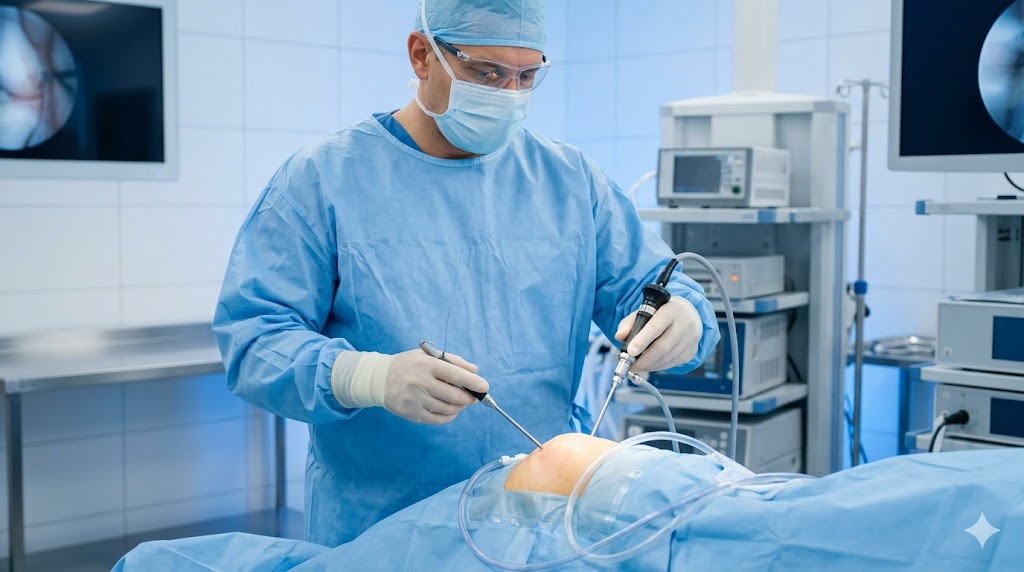
ACL reconstruction surgery is performed by me using advanced, minimally invasive techniques (arthroscopy). This method causes minimal damage to healthy tissues, significantly reduces post-operative pain, and accelerates the recovery process. In the operating room, the following steps are carried out with the utmost precision:
Absolute Calm and Painlessness: First, the experienced anesthesia team provides a completely painless condition (local anesthesia from the back or general anesthesia) for you so that you are in total peace during the surgery.
Delicate Preparation of the Replacement Tissue (Graft): Since the torn ligament cannot be sutured, I use a very strong tissue (usually your own hamstring tendons) with a very small incision to build a new and exceptionally strong ligament.
Camera Entry and Microscopic Vision (Arthroscopy): Through two tiny holes just a few millimeters wide, an advanced camera enters the knee. This allows me to examine and treat all angles and other potential injuries (such as meniscus tears) with high magnification on a monitor.
Placement with Utmost Anatomical Precision: The replacement tissue is placed exactly in the natural and original path of the previous ligament and is securely fixed and tightened inside the bone using very safe titanium/absorbable screws or buttons.
3. Comprehensive Rehabilitation Roadmap and Care Supervised by Dr. Emad
The success of this surgery is a team effort between you and me. Strictly following this phasing is the golden key to your return to health.
Phase One: The First Two Weeks After Surgery (Protection and Initiation of Movement)
In this stage, our goal is to reduce inflammation, protect the new ligament, and prevent joint stiffness.
Important Care for Phase One:
Pain and Swelling Control: Take prescribed medications exactly on time. Use an ice compress (inside a towel) on the knee 5 times a day, for 20 minutes each time.
Resting Position: While lying down, place a pillow under the ankle and calf so that the leg is higher than the heart level. Never place a pillow under the knee; the knee must rest completely straight.
Wound Care: The dressing must remain completely dry. From the fourth day onwards, you can shower using a waterproof dressing.
Crutches and Brace: Walking is only permitted with two underarm crutches and a knee brace locked in the straight position. Light contact of the sole of the foot with the ground is acceptable.
Phase One Exercise Training:
Ankle Pumps
Goal of the movement: To prevent blood clots in the calf and reduce swelling.
Step-by-step Mechanics Training: Lie on your back on the bed. Stretch your legs out. Powerfully pull the toes and ankle of the operated leg upward (toward the face). Pause for one second, then flex the ankle strongly downward (like pressing a gas pedal).
Repetitions and Timing: During the day, perform this movement 30 times for every hour you are awake.
Safety Warning: This movement is completely safe, but if you feel sudden and severe pain in the back of the calf muscle (gastrocnemius), reduce the pressure.
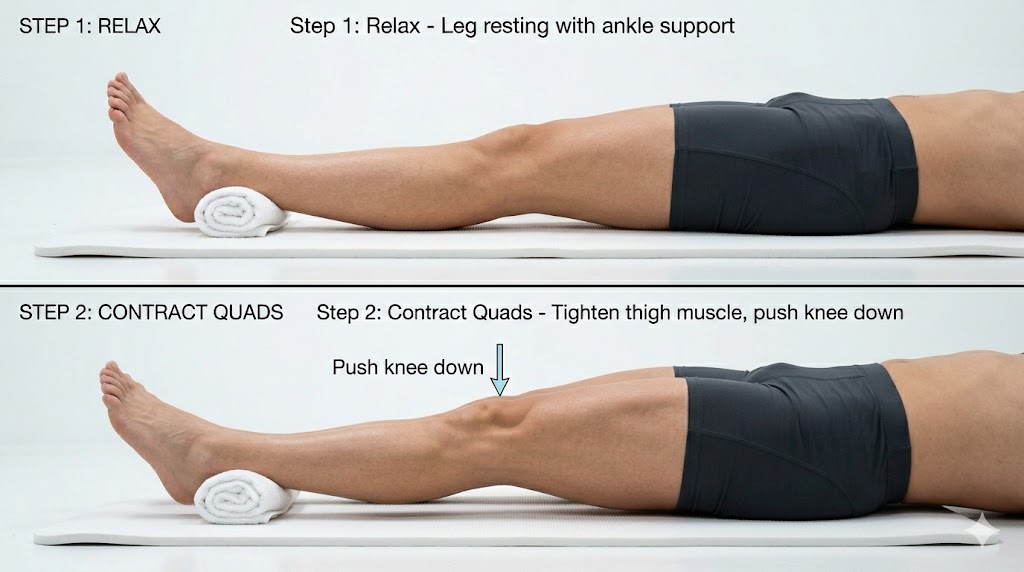
Quadriceps Contractions (Quad Sets)
Goal of the movement: To wake up the muscle in front of the thigh and help achieve full straightening of the knee joint.
Step-by-step Mechanics Training: Lie on your back and stretch the operated leg completely flat on the ground. Place a very small rolled-up towel under the ankle so that the heel is slightly off the ground. Now, try to push the back of your knee down toward the mattress by tightening the muscle in front of your thigh so that the kneecap is pulled slightly upward.
Repetitions and Timing: Hold the contraction for 5 seconds and then release. 3 sets of 10, 3 times a day.
Safety Warning: Mild pressure behind the knee is normal, but this movement should not cause sharp, stabbing pain at the incision site.
Phase Two: The Second Two Weeks (Weeks Three and Four - Increasing Range of Motion)
In this phase, we gradually bend the knee more and reduce dependence on crutches.
Important Care for Phase Two:
Walking Changes: With my approval during periodic visits, you will gradually set aside one of the crutches.
Bathing: After the stitches are removed (usually on day 14), you can bathe normally without a waterproof dressing.
Daily Activities: Returning to light work and desk jobs is permitted. Prolonged standing is still prohibited.
Phase Two Exercise Training:
Heel Slides
Goal of the movement: Gradual increase of the knee flexion angle toward 90 degrees.
Step-by-step Mechanics Training: Lie on your back. Keep both legs straight. Keep the heel of the operated leg on the mattress and slowly slide the heel on the floor toward your buttocks by bending the knee. Go as far as you feel a tolerable stretch (and not severe pain) in the knee. Pause and then slowly slide the heel on the floor until the leg is straight again.
Repetitions and Timing: 3 sets of 10, 3 times a day. Pause for 3 seconds at the peak of the bend.
Safety Warning: Do not lift the heel off the ground. Never use your hands to pull the leg to bend the knee; let the muscles do the work.
Straight Leg Raises
Goal of the movement: Strengthening the thigh and hip muscles without putting pressure on the ACL.
Step-by-step Mechanics Training: Lie on your back. Completely bend the knee of the healthy leg so the sole of the healthy foot is on the floor (to protect the lower back). Keep the operated leg completely straight on the floor. Tighten the muscle in front of the thigh to lock the knee. Now, lift the entire straight leg about 20 cm off the ground.
Repetitions and Timing: Hold the leg in the air for 3 seconds and lower it slowly. 3 sets of 10, 3 times a day.
Safety Warning: If the knee bends while lifting, it means the muscle is still weak. Stop the exercise and return to the muscle contraction exercise (Phase One).
Phase Three: The Second Month (Return to Daily Life and Initial Strengthening)
In this month, you get closer to normal life and the knee feels stronger than before.
Important Care for Phase Three:
Walking and Driving: Crutches are completely set aside. You should try to walk completely naturally and without limping. Driving for short distances (ensuring braking power) is permitted.
Outdoor Activities: Beginning light walks outside the home and increasing social activities.
Phase Three Exercise Training:
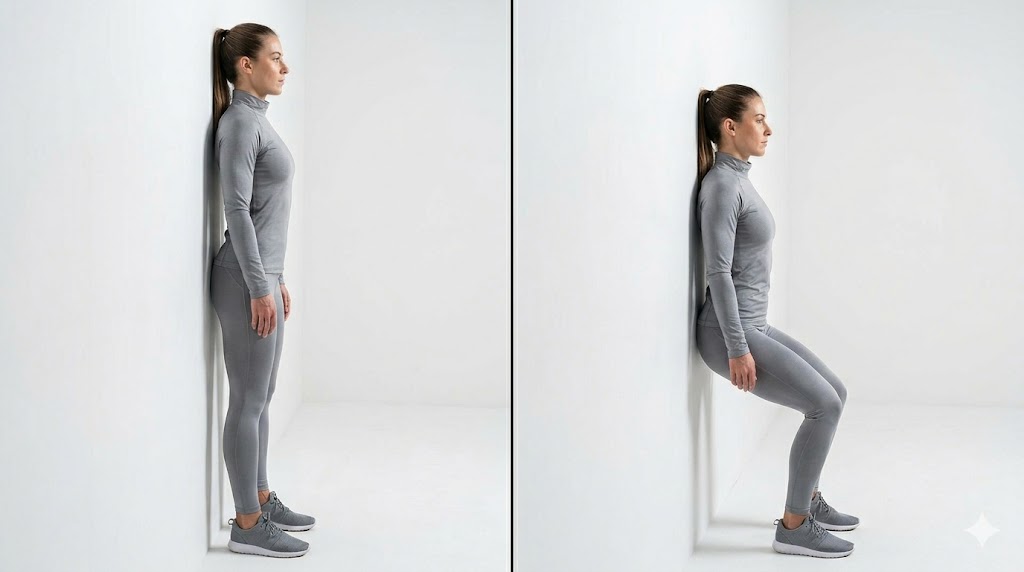
Wall Mini-Squats
Goal of the movement: Coordinated strengthening of the quadriceps and hamstring muscles in a weight-bearing state.
Step-by-step Mechanics Training: Stand with your back against a flat wall and lean on it. Spread your feet shoulder-width apart and place them about 30 cm away from the wall. Now, while your back slides down the wall, slowly bend your knees as if you want to sit on a high chair. (Only go down to a 45-degree angle). Pause and push through your heels to come back up.
Repetitions and Timing: 3 sets of 10, twice a day.
Safety Warning: While descending, your knees should never extend past your toes. The bending angle should not exceed 45 to 60 degrees.
Stationary Bike
Goal of the movement: Improving knee joint mobility, improving muscular endurance, and blood pumping.
Step-by-step Mechanics Training: Adjust the seat of the stationary bike slightly higher than usual so that the knee is almost straight at the lowest point of the pedal stroke. Initially, practice pedaling backwards only. Once the joint flexes enough (about 100 degrees), start full forward pedaling with zero resistance (gear).
Repetitions and Timing: 10 to 15 minutes daily.
Safety Warning: In this phase, you should never use heavy resistance gears on the bike. The goal is only fluidity of movement, not bodybuilding.
Phase Four: The Third Month (Advanced Strengthening and Balance)
The new ligament is now well-fused with the bone, and it is time to restore intelligence and balance to the joint.
Important Care for Phase Four:
Physical Tasks: Returning to jobs that require long periods of standing or moderate physical activity is permitted.
Running Readiness: The knee becomes ready to start soft jumping movements.
Phase Four Exercise Training:
Step-Ups
Goal of the movement: Strengthening single-leg weight-bearing power and simulating everyday step-by-step movements.
Step-by-step Mechanics Training: Stand in front of a short step (10 to 15 cm high). First, place the operated leg on the step. By pushing through the heel of the operated leg, lift your entire body until the healthy leg is also on the step. To descend, first place the healthy leg on the ground and then the operated leg.
Repetitions and Timing: 3 sets of 10, once a day.
Safety Warning: While ascending, make sure the knee of the operated leg does not deviate inward or outward and stays in a completely straight line with the ankle.
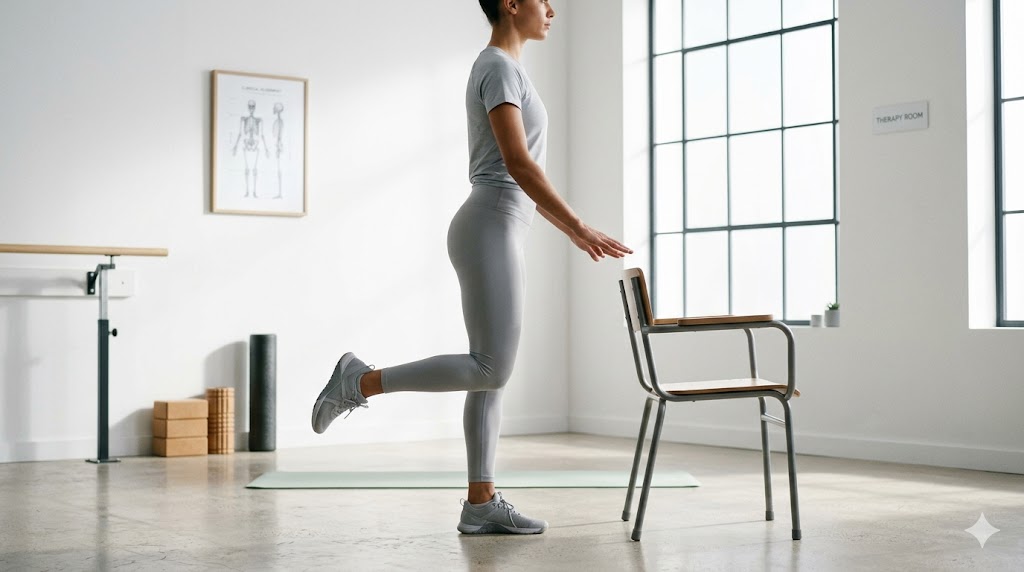
Single-Leg Stance
Goal of the movement: Restoring proprioception and balance to the knee.
Step-by-step Mechanics Training: Stand next to a chair or wall (for safety). Lift your healthy leg off the ground and put all your weight on the operated leg. Try to maintain your balance and keep the knee of the supporting leg slightly (very subtly) bent so it does not lock.
Repetitions and Timing: Maintain balance for 30 seconds. Repeat this 5 times.
Safety Warning: To prevent falling, be sure to perform this exercise next to a reliable support.
4. Return to Professional Sports (Month 4 Onwards)
From the fourth month onwards, under the supervision of me and the physiotherapy team, more specialized exercises such as jogging on a treadmill, gentle changes of direction, and agility drills begin. A full return to high-impact and professional sports such as football, basketball, or skiing requires successfully passing strength and jumping tests between months 6 to 9 after surgery. I will be by your side until the moment you return to the competition field.