This guide is for persistent low back pain for which an examination has found no specific cause and your doctor considers exercise suitable. Water supports part of your weight and may make movement easier. This article does not replace an examination or your treatment plan. If pain travels below your knee, you have numbness or weakness, or your pain has not been assessed, seek an examination before entering the pool.
1🌊 Why water?
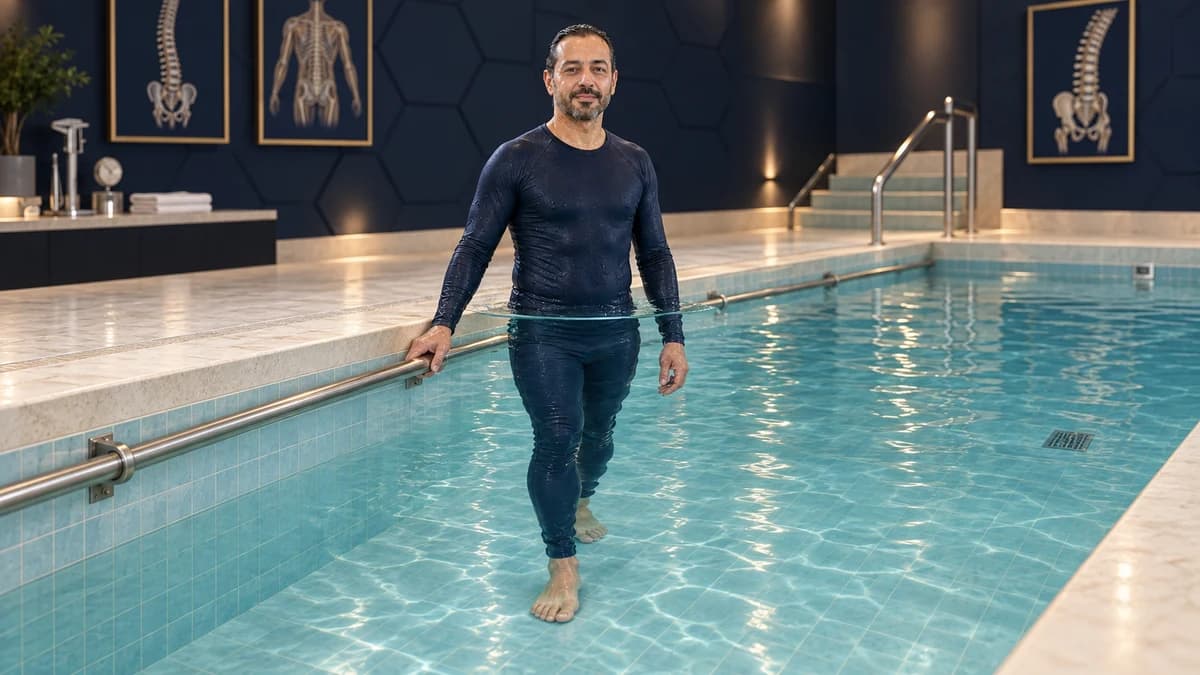
Water supports part of your body weight and may make movement easier. Its resistance also makes muscles work in both directions. Water depth, movement speed and equipment affect the effort required; choose them to suit your ability.
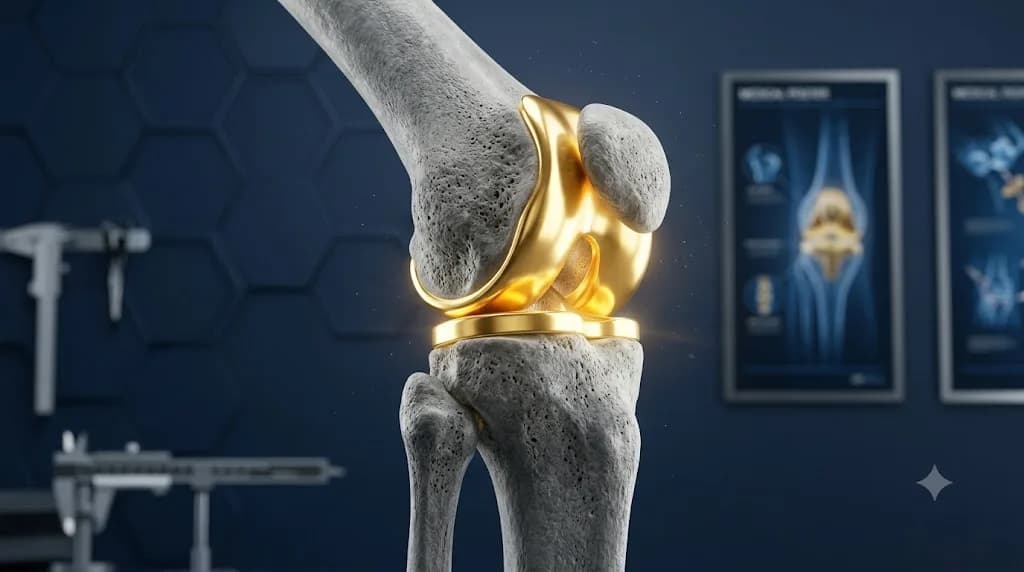
A study of joint replacements fitted with sensors measured 36–55% lower hip and knee forces in chest-deep water. Fast movement and resistance equipment increased these forces by up to 59%. These measurements concern the hip and knee; the same percentages cannot be applied to the low back.
In a trial involving 113 patients, aquatic exercise reduced disability more than electrical stimulation and infrared heat. The difference remained at 12 months. This does not show that aquatic exercise is better than every type of physiotherapy. An analysis of 26 trials found promising pain relief with aquatic exercise, but confidence in the evidence was very low. In a 10-week study of 34 patients, some back muscles increased in size within the water group. Strength improved in both groups, with no clear advantage for aquatic exercise.
Land-based exercise also helps chronic low back pain. Aquatic exercise may suit you when movement feels more comfortable in water and you can keep attending. The cause of your pain and your abilities matter when choosing an approach.
2🏊 Before you get in
Choose a pool with an even floor, steps and a handrail. Check how to enter and leave before starting. Begin in shallow water where you can stand comfortably. Suitable temperature and depth depend on your health and the exercise; do not continue if the water makes you uncomfortable.
Never enter the pool alone. Even if you swim well, use a pool with a lifeguard and a companion who can see you. Dizziness, a drop in blood pressure when leaving warm water and slipping can be dangerous. Learn the exercises from a physiotherapist before practising independently.
- Locate the steps, handrail and shallow area before entering, and check that the equipment is secure.
- Do not start a session if you feel unwell, nauseated or unusually tired.
- Keep a bottle of drinking water at the poolside; you can sweat in water without noticing.
- Wear comfortable, well-fitting swimwear that does not bunch up in the water.
- If you take heart or blood-pressure medicines, or have felt dizzy leaving warm water, discuss this with your doctor before starting.
- Start with gentle walking and easy movements. Learn and control the basic movements before trying higher levels.
🪜 Getting in and out of the pool safely
Most pool injuries happen not in the water but on the wet floor beside it. Read these few rules before your first session.
More detailLess detail
- Wear non-slip sandals, and never run or take long strides on the wet floor.
- Always enter by the steps with a hand on the rail; do not jump in from the edge and do not dive.
- Shower for one minute before you get in — this hygiene rule keeps the pool water healthier for everyone.
- Stand on the step until your body adjusts to the water temperature, then move into the deeper part.
- Use the same steps to get out, rather than pushing yourself up over the pool edge on your arms.
- Leave your towel somewhere that does not require a long walk across the wet floor to reach it.

3⛔ Who must not go into the water
If a condition or symptom could endanger you or other pool users, have it assessed before entering. The advice below covers medical suitability and pool hygiene. Exclusion from a study alone does not make aquatic exercise unsuitable for everyone in that group.
- Do not enter the pool with diarrhoea. If it was caused by the parasite Cryptosporidium, stay out for two weeks after the diarrhoea has completely stopped.
- Do not enter with an open wound or an unhealed surgical site unless your treatment team and the pool staff allow it and you have an appropriate waterproof covering.
- Do not enter with a fever, an active infection or a contagious skin condition.
- Do not swallow pool water, and shower for one minute before entering.
- If bladder or bowel incontinence is not controlled, consult your doctor before entering.
- If you are pregnant, breastfeeding or allergic to pool disinfectants, check with your doctor whether this programme is suitable.
- If you fear water or cannot feel comfortable in it, do not force yourself to enter. You can choose suitable exercises on land.
- If you have uncontrolled heart, breathing or neurological disease, epilepsy, a blood-pressure drop on standing or cognitive impairment, consult your doctor first.
- If your back pain has not been explained, or comes with fever, unexplained weight loss, recent injury or worsening weakness, seek an examination before using the pool.
4🏋️ Hydrotherapy for the low back: the exercises
These twenty movements are arranged in four levels. You do not need to perform them all in one session; your physiotherapist selects the exercises that suit you. Read the summary, full instructions, water depth and stopping conditions before each movement. Follow your personal plan for repetitions and duration.
When an exercise calls for a still trunk, do not twist it to make the task easier. Do not hold your breath. Stop if pain travels below the knee or new numbness or weakness appears, and follow the warning-sign instructions.
🚶 Level one: Getting used to water and walking
Use these five movements to practise standing and moving gently in water. The aim is to get used to water resistance and maintain balance.
Forward Water Walking
Walk gently forwards in navel-deep water, placing the heel and then the toes on the floor. This warms you up and introduces water resistance. Stop if pain travels down your leg.
More detailLess detail
Purpose and why it matters: This warms the back and hip muscles and lets your body adapt to water resistance before later exercises.
Equipment and environmental safety: No equipment. Choose an even stretch of pool floor and keep the wall or rail within reach.
Water depth and flotation: Water at navel level; no flotation device is needed. If your balance is poor, use shallower water beside the rail.
Starting position: Stand with feet hip-width apart. Relax your shoulders and look forward.
How to do it:
- Place the heel first, then transfer weight toward the toes.
- Let your arms move freely with your legs; do not lock them across your chest.
- Keep your trunk upright instead of leaning forward to move.
- Walk for the time in your plan and rest before fatigue.
Range, side, and limits: There is no angle limit; walk slowly enough to talk comfortably.
Amount and duration: Follow your physiotherapy plan for walking duration. Begin gently and rest before fatigue or loss of balance.
Signs of correct performance: Your trunk stays upright, shoulders stay down and both feet land fully on the pool floor; you do not walk on your toes.
When to stop: Stop if pain travels down the leg, the leg becomes numb, or you feel dizzy or breathless.
Common mistakes: Leaning forward against the water and walking on the toes instead of placing the heel first.
If this movement is difficult: Use shallower water and a shorter route, or keep one hand on the rail as you walk.

Backward Water Walking
Take short backward steps in navel-deep water, putting the toes down before the heel. Keep your trunk upright and check behind you. Stop if your back hurts or you lose balance.
More detailLess detail
Purpose and why it matters: This works the muscles at the back of the thighs and buttocks and helps you practise standing upright.
Equipment and environmental safety: No equipment. Use a quiet route with clear space behind you.
Water depth and flotation: Water should reach the navel; no flotation device is needed.
Starting position: Stand with feet hip-width apart, weight on both feet and your trunk upright.
How to do it:
- Take a short step backward, placing the toes down before lowering the heel.
- Keep your trunk upright and do not let the pelvis tip forward or your back arch.
- Every few steps, turn your head slightly to check behind you.
- Continue for the time in your plan and rest before losing balance.
Range, side, and limits: Take short, controlled steps. Your low-back arch should not increase beyond normal standing.
Amount and duration: Follow your plan for backward-walking time and distance. Rest if your steps become irregular or your trunk bends.
Signs of correct performance: The toes reach the floor before the heel. Your trunk stays upright and the distance between ribs and pelvis is unchanged.
When to stop: Stop if your back arches painfully, pain travels down the leg or you lose balance.
Common mistakes: Arching the back to move backward and taking long steps that upset balance.
If this movement is difficult: Keep one hand on the rail and take backward steps along it.

Side Stepping at the Rail
Face the rail and step sideways without crossing your feet. Lead with the right foot when moving right. This works the outer hip muscles. Stop if pain increases.
More detailLess detail
Purpose and why it matters: This works the outer hip muscles, which help keep the pelvis stable when walking.
Equipment and environmental safety: Use a rail or the pool wall. Rest a hand on the rail for balance instead of pulling yourself along.
Water depth and flotation: Water should reach the navel. No flotation device is needed; use the rail for balance.
Starting position: Face the rail with feet hip-width apart. Keep one hand on the rail and your trunk upright.
How to do it:
- To move right, lead sideways with the right foot; to move left, lead with the left foot.
- Bring the other foot closer until your feet are hip-width apart again; do not cross them.
- Take the number of steps in your plan, then return along the same route.
- Keep your shoulders facing the rail without rotating your pelvis.
Range, side, and limits: Open the feet only slightly wider than shoulder-width. Do not let the pelvis drop sideways.
Amount and duration: Follow your plan for the number of steps in each direction. Rest before your feet cross or your pelvis tilts.
Signs of correct performance: Your shoulders face the rail, your pelvis stays level and the feet never cross in front or behind each other.
When to stop: Stop if outer hip pain increases with each step or pain travels down the leg.
Common mistakes: Pulling yourself along with the hand on the rail and rotating the pelvis instead of stepping sideways.
If this movement is difficult: Take shorter steps and hold the rail with both hands.

High-Knee Marching
March beside the rail, lifting one knee at a time without taking the thigh above horizontal. Use this movement to practise balance and pelvic control. Stop if pain travels down your leg or you lose balance.
More detailLess detail
Purpose and why it matters: This warms the hip joint and lets you practise balancing on one leg. Lift the leg without bending your back.
Equipment and environmental safety: No equipment. Keep a rail or the wall within reach in case you lose balance.
Water depth and flotation: Water should reach the sternum. No flotation device is needed; the water supports more of your body weight at this depth.
Starting position: Stand with feet hip-width apart. Gently tighten the abdomen and relax the shoulders.
How to do it:
- Shift your weight onto one leg and gently lift the other knee.
- Lift until the thigh is nearly horizontal, no higher.
- Lower the foot with control, then lift the other knee.
- Follow the repetitions in your plan and rest before fatigue.
Range, side, and limits: Bring the thigh close to horizontal, not above it. Lifting higher can rotate the pelvis and round the low back.
Amount and duration: Follow your plan for the number of knee lifts. Rest when balance or keeping the trunk steady becomes difficult.
Signs of correct performance: Only the legs move; the upper body stays still. Both sides of the pelvis remain level and the back neither rounds nor arches.
When to stop: Stop if pain travels down the leg, your groin hurts or you lose balance.
Common mistakes: Lifting the thigh above horizontal and rounding the low back, or leaning sideways as the knee rises.
If this movement is difficult: Keep one hand on the rail and lift the knee less.

Neutral-Spine Standing
Stand with your back toward the wall and keep the natural curve of your low back while breathing gently. Do not lift your shoulders as you breathe in. This helps you keep your trunk steady in later exercises. Stop for pain or dizziness.
More detailLess detail
Purpose and why it matters: Find your natural low-back curve and maintain it while breathing gently. You will use this position in later movements.
Equipment and environmental safety: Use the wall as a light reference for the back of the head and buttocks, not to support your full weight.
Water depth and flotation: Water should reach the sternum. No flotation device is needed; keep the pool wall behind you.
Starting position: Stand with your back toward the wall. Keep feet hip-width apart and a palm’s width from the wall, with knees slightly bent.
How to do it:
- Bring the back of your head, the area between the shoulder blades and your buttocks toward the wall. Keep your natural low-back curve.
- Breathe in through your nose; let the side ribs expand without lifting your shoulders.
- As you breathe out gently, lightly tighten your abdomen without changing the low-back curve.
- Follow the number of breaths in your plan; do not breathe deeper or faster than feels comfortable.
Range, side, and limits: Keep your low-back curve unchanged. This practises holding a position rather than moving through a range.
Amount and duration: Follow your plan for breaths and practice rounds. Breathe naturally and gently; do not force deep breaths.
Signs of correct performance: Your shoulders stay down as you breathe in, the ribs expand sideways and the low-back-to-wall distance stays constant. Your trunk stays upright and feet remain on the floor.
When to stop: Stop if deep breathing makes you dizzy or holding the position increases pain.
Common mistakes: Flattening the low back completely against the wall and lifting the shoulders as you breathe in.
If this movement is difficult: Use shallower water and place your hands on a rail beside the wall.

🤸 Level two: Mobility and stretching
These six movements help you move your low back and hips. Keep each stretch gentle and within a pain-free range.
Standing Pelvic Tilt
Tip your pelvis gently backward and forward, then return to a position with your natural low-back curve. This practises pelvic control. Stop if pain becomes sharp or travels down your leg.
More detailLess detail
Purpose and why it matters: This helps you move the low back gently and control its curve, which is also useful in strengthening exercises.
Equipment and environmental safety: Keep the wall behind you to help you notice the pelvic movement.
Water depth and flotation: Water should reach the sternum. No flotation device is needed; keep the pool wall behind you.
Starting position: Stand with your back toward the wall, feet hip-width apart and slightly forward. Keep knees slightly bent and hands on your pelvis.
How to do it:
- Gently tighten the abdomen and tip the pelvis backward so the low back moves closer to the wall.
- Tip the pelvis gently forward to increase the low-back curve slightly; keep the movement small.
- Return to the middle position with your natural low-back curve.
- Repeat this movement the number of times in your plan.
Range, side, and limits: Use a small, pain-free movement. The pelvis moves while the knees and shoulders stay still.
Amount and duration: Follow your plan for repetitions of the pelvic movement. Keep the range small and rest before fatigue.
Signs of correct performance: Only the pelvis tilts. The knees stay still, shoulders do not move up or down and the feet remain on the floor.
When to stop: Stop if pelvic movement causes sharp pain or pain travelling down the leg.
Common mistakes: Moving the knees to produce the pelvic movement and forcing the low back against the wall.
If this movement is difficult: Use a smaller movement and practise only the backward pelvic tilt.

Single Knee to Chest
Keep one hand on the rail and hold behind your thigh with the other. Bring the knee toward your chest until you feel a gentle stretch; keep the supporting foot planted. Stop if pain travels into the calf or foot.
More detailLess detail
Purpose and why it matters: This gently stretches the muscles at the back of the pelvis and in the low back.
Equipment and environmental safety: Use a secure rail and keep one hand on it throughout the movement.
Water depth and flotation: Water should reach the sternum. No flotation device is needed; hold the rail throughout for balance.
Starting position: Stand beside the rail and hold it with one hand. Keep weight on the supporting leg and your trunk upright.
How to do it:
- Keep one hand on the rail, lift one knee and hold behind that thigh with your free hand.
- Bring the knee gently toward the chest until you feel a mild stretch in the buttock or low back.
- Hold for the time in your plan and breathe gently.
- Lower the leg slowly. Keep holding the rail and repeat with the other leg.
Range, side, and limits: Stop at a gentle, pain-free stretch. Keep the supporting foot on the floor and your trunk upright without leaning back.
Amount and duration: Follow your plan for stretch duration and repetitions on each leg. Breathe gently throughout and do not stretch into pain.
Signs of correct performance: The supporting foot stays fully planted and the trunk remains upright while you hold behind the raised thigh.
When to stop: Stop if pain travels into the calf or foot, the leg becomes numb, or pulling the knee closer sharpens the pain.
Common mistakes: Holding the front of the knee instead of behind the thigh and bending forward instead of lifting the knee.
If this movement is difficult: Rest your back against the pool wall and lift the knee less.

Hamstring Stretch on the Step
Put your heel on a low step and hold the rail. Lean slightly forward from your hip while keeping your natural low-back curve, until the back of the thigh stretches. Stop if pain travels into the calf or foot.
More detailLess detail
Purpose and why it matters: This stretches the muscles behind the thigh, the hamstrings, to help their flexibility. Keep the pelvis and low back steady.
Equipment and environmental safety: Use a non-slip pool step and its rail. Keep the other foot fully planted on the pool floor.
Water depth and flotation: Use groin-deep water beside the pool steps. No flotation device is needed; hold the step rail.
Starting position: Face the step with one hand on the rail. Keep your supporting foot planted and its toes facing forward.
How to do it:
- Place one heel on the first step and keep that knee almost straight.
- Keep your natural low-back curve and your trunk facing forward.
- Lean slightly forward from the hip until you feel a gentle stretch behind the thigh.
- Hold for the time in your plan, return slowly and change legs.
Range, side, and limits: Lean forward only until you feel a gentle stretch behind the thigh. Move back a little if your back rounds.
Amount and duration: Follow your plan for stretch duration and rounds on each leg. Keep the stretch gentle; do not force or bounce it.
Signs of correct performance: The natural low-back curve is maintained, the chest faces forward and the knee of the leg on the step is almost straight.
When to stop: Stop if pain travels into the calf or foot or you feel burning behind the knee.
Common mistakes: Rounding the low back to reach the toes and placing the heel on a step that is too high.
If this movement is difficult: Use a lower step or keep the knee slightly bent.

Standing Hip-Flexor Stretch
Stand beside the wall with one foot behind you. Move the pelvis slightly forward to stretch the front of the thigh of the leg behind you. Do not increase your low-back arch. Stop if your groin or back hurts.
More detailLess detail
Purpose and why it matters: This stretches the muscles at the front of the thigh and hip without increasing the low-back arch.
Equipment and environmental safety: Use the wall or rail for balance. Both feet should be on an even floor.
Water depth and flotation: Water should reach the navel. No flotation device is needed; use the wall for balance.
Starting position: Stand beside the wall and take one long step back. Point both feet forward and bend the front knee slightly.
How to do it:
- Gently tighten the abdomen and tip the pelvis slightly backward to reduce the low-back arch.
- Move the pelvis gently forward until the front of the thigh of the leg behind you stretches; do not arch the back.
- Hold for the time in your plan and breathe gently.
- Return to the starting position and change legs.
Range, side, and limits: Feel the stretch at the front of the thigh of the leg behind you. If your low-back arch increases, move the pelvis slightly back.
Amount and duration: Follow your plan for stretch duration and repetitions on each leg. Return to the starting position before your low-back arch increases.
Signs of correct performance: The back heel points downward, both feet point forward and the low-back curve remains unchanged.
When to stop: Stop if the groin hurts or back pain becomes sharper.
Common mistakes: Arching the low back instead of moving the pelvis forward and turning the back foot outward.
If this movement is difficult: Take a shorter backward step and place both hands on the wall.

Gentle Trunk Rotation
In sternum-deep water, rotate your trunk gently left and right while your pelvis and feet face forward. Use this to practise comfortable back rotation. Stop if pain becomes sharp or travels down your leg.
More detailLess detail
Purpose and why it matters: Use this to practise gentle spinal rotation within a comfortable, pain-free range.
Equipment and environmental safety: No equipment. Leave enough clear space around you to open both arms.
Water depth and flotation: Water should reach the sternum; no flotation device is needed.
Starting position: Stand with feet slightly wider than hip-width and knees slightly bent. Hold your hands in front of the chest with palms facing each other.
How to do it:
- Gently tighten your abdomen and keep your natural low-back curve.
- Rotate the trunk slowly to one side, letting the hands move through water; the pelvis and feet stay forward.
- Return to the middle, then rotate to the other side.
- Follow the repetitions in your plan for each side.
Range, side, and limits: Rotate only within a pain-free range with the toes planted on the pool floor. Do not use sudden movements.
Amount and duration: Follow your plan for rotations to each side. Move slowly and rest before fatigue or pelvic rotation.
Signs of correct performance: The pelvis and feet stay facing forward; only the upper trunk rotates. Movement is slow and smooth.
When to stop: Stop if rotation causes sharp pain or pain travelling down the leg.
Common mistakes: Rotating the pelvis with the trunk and using fast movements to force more back rotation.
If this movement is difficult: Keep your hands closer to your body and reduce the rotation range.

Standing Side Bend
Slide one hand down the side of your thigh and bend toward that side. Keep weight on both feet. This stretches the side of your low back. Stop for sharp pain in your side or back.
More detailLess detail
Purpose and why it matters: This stretches the side of the low back and lets you practise a gentle sideways bend.
Equipment and environmental safety: No equipment. Keep clear space on both sides.
Water depth and flotation: Water should reach the sternum; no flotation device is needed.
Starting position: Stand with feet shoulder-width apart, knees slightly bent and arms relaxed by your sides.
How to do it:
- Gently tighten your abdomen and keep equal weight on both feet.
- Slide one hand down the side of your thigh toward the knee and bend toward that side.
- Return to the middle slowly without a sudden movement.
- Repeat on each side according to your plan.
Range, side, and limits: Bend sideways only within a pain-free range. Do not bend your trunk forward or backward.
Amount and duration: Follow your plan for side bends. Rest if it becomes difficult to keep equal weight on both feet.
Signs of correct performance: Weight remains on both feet. The trunk bends only sideways and the shoulders do not lift.
When to stop: Stop if sharp pain develops in the side or back, or pain travels down the leg.
Common mistakes: Rotating the trunk during the side bend and shifting weight off one foot so the pelvis drops sideways.
If this movement is difficult: Reduce the range and keep one hand on the rail.

💪 Level three: Strengthening
These four movements strengthen the hip and calf muscles. Move slowly and keep your back, pelvis and legs aligned.
Standing Hip Abduction
Beside the rail, keep your weight on the leg nearest it and move the outer leg gently sideways. Keep the pelvis level and trunk upright. This strengthens the outer hip muscles. Stop if pain develops.
More detailLess detail
Purpose and why it matters: This strengthens the outer hip muscles, which help balance the pelvis during walking and single-leg standing.
Equipment and environmental safety: A secure rail is needed for balance. Add resistance equipment only after your physiotherapist selects it and teaches you its use.
Water depth and flotation: Water should reach the sternum. Hold the rail for balance; this version uses no flotation device around the ankle.
Starting position: Stand side-on to the rail and hold it with the nearer hand. Keep weight on the nearer leg so the outer leg can move freely.
How to do it:
- Keep the outer leg straight and move it gently sideways.
- Move only while the pelvis stays level and the trunk does not lean away.
- Return along the same path at a slow speed.
- Follow your planned repetitions, then turn around at the rail and exercise the other leg.
Range, side, and limits: Move the leg sideways only while the pelvis stays level and the trunk upright. Do not side-bend the back to lift higher.
Amount and duration: Follow your plan for repetitions on each leg. Rest before your pelvis tilts or your trunk bends; do not add resistance equipment yourself.
Signs of correct performance: Both sides of the pelvis stay level, the trunk remains upright and only the leg moves. The outward and return speeds match.
When to stop: Stop if the outer hip or groin hurts, or pain travels down the leg.
Common mistakes: Leaning the trunk away to lift the leg higher and letting the leg drop on its return.
If this movement is difficult: Bend the knee slightly, reduce the range and place both hands on the rail.

Standing Hip Extension
Face the rail and move a straight leg gently backward. The buttock muscles work while your natural low-back curve stays unchanged. Stop if your back arches or hurts.
More detailLess detail
Purpose and why it matters: This strengthens the buttock muscles. Move the leg at the hip while keeping the low back still.
Equipment and environmental safety: Face the pool rail or wall.
Water depth and flotation: Water should reach the sternum. No flotation device is needed; use the rail for balance.
Starting position: Face the rail and rest both hands lightly on it. Keep feet hip-width apart and gently tighten the abdomen.
How to do it:
- Gently tighten your abdomen before moving and keep your natural low-back curve throughout.
- Move one straight leg gently backward, only while the low-back curve stays unchanged.
- Bring the leg slowly back to the starting position with control.
- Follow your plan for repetitions on each leg.
Range, side, and limits: Move the leg back only while your low-back curve stays unchanged. Keep the trunk and pelvis still.
Amount and duration: Follow your plan for repetitions on each leg. Rest before your low back arches or the leg movement loses control.
Signs of correct performance: The distance between lower ribs and pelvis stays constant, the pelvis does not rotate and the supporting foot stays fully planted.
When to stop: Stop if the back arches or hurts as the leg moves back, or pain travels down the leg.
Common mistakes: Taking the leg too far back and arching the low back to compensate, or pulling yourself forward with your arms.
If this movement is difficult: Keep the knee slightly bent and reduce the range.

Aquatic Half Squat
Hold the rail, bend your knees a little, then stand; keep your thighs above horizontal. This strengthens the thighs and buttocks. Keep your head and face above water. Stop if your back or knee hurts.
More detailLess detail
Purpose and why it matters: This strengthens the thighs and buttocks through a sitting-and-standing movement while water supports part of your weight.
Equipment and environmental safety: Hold a secure rail. Use an even floor and keep your heels in contact with it.
Water depth and flotation: Start with water at the lower tip of the sternum. As the knees bend slightly, the surface rises toward the underarms; keep your head and face fully above water.
Starting position: Hold the rail with your feet slightly wider than hip-width and toes turned slightly outward.
How to do it:
- Move your hips back as if sitting onto a high chair.
- Bend the knees slightly; the thighs must remain clearly above horizontal.
- Keep your weight over the middle of the feet and the knees aligned with the toes.
- Press the heels into the floor to stand, without locking the knees at the top.
Range, side, and limits: Bend the knees only a little and keep the thighs above horizontal. Keep the head and face clear of the water; do not squat deeply.
Amount and duration: Follow your plan for sit-and-stand repetitions. Rest before fatigue or the knees falling inward.
Signs of correct performance: The back keeps its natural curve, heels stay on the floor and knees do not fall inward.
When to stop: Stop if the back or front of the knee hurts when rising, or pain travels down the leg.
Common mistakes: Lowering too far and rounding the low back, or lifting the heels off the floor.
If this movement is difficult: Reduce the range and hold the rail with both hands.

Heel Raises
Hold the rail, raise both heels slowly and lower them with control. This strengthens your calves. Stop for pain behind the heel or in the sole, or if you lose balance.
More detailLess detail
Purpose and why it matters: This strengthens the calves and lets you practise balance and foot control for walking.
Equipment and environmental safety: Use the rail for balance, not to pull yourself upward.
Water depth and flotation: Water should reach the sternum. No flotation device is needed; use the rail for balance.
Starting position: Face the rail with feet hip-width apart. Keep weight on both feet and straighten your trunk.
How to do it:
- Raise both heels slowly so your weight moves onto the forefeet.
- Keep your ankles straight at the top; do not let them roll outward.
- Lower the heels slowly with control.
- Repeat according to your plan.
Range, side, and limits: Raise the heels only while balance is maintained. Do not arch the low back to rise higher.
Amount and duration: Follow your plan for heel raises. Rest if the two feet move unevenly or balance becomes difficult.
Signs of correct performance: Both heels rise together to the same height. The ankles remain straight without rolling outward.
When to stop: Stop if the tendon behind the heel or the sole hurts, or you lose balance.
Common mistakes: Pulling yourself up with your hands on the rail and dropping the heels suddenly.
If this movement is difficult: Reduce the range and hold the rail with both hands.

🌊 Level four: Endurance and advanced exercises
These five movements develop endurance and trunk control. After mastering the first three levels, choose suitable movements with your physiotherapist.
Water Jogging in Place
Jog in place in the water with short steps and an upright trunk. This helps develop endurance; water walking should already feel comfortable. Stop for breathlessness, dizziness or pain travelling down the leg.
More detailLess detail
Purpose and why it matters: Jogging in water helps develop endurance. Water supports part of your weight, but your feet still contact the pool floor.
Equipment and environmental safety: No equipment. Keep a rail within reach and choose a stable, non-slip area of the pool floor.
Water depth and flotation: Water should reach the lower tip of the sternum; no flotation device is needed. Choose a depth where you can maintain balance.
Starting position: Stand with feet hip-width apart, trunk upright and elbows bent close to your body.
How to do it:
- Alternate your feet in short steps, lifting the knees only a little while keeping the pelvis and low-back curve steady.
- Move your bent arms with the legs as in jogging; do not slap the water.
- Keep the trunk upright and do not lean forward to move faster.
- Follow your plan for each interval. Walk gently between rounds until your breathing settles and balance returns.
Range, side, and limits: Lift the knees only a little. Keep the pelvis and natural low-back curve steady throughout.
Amount and duration: Follow your plan for jogging intervals, walking breaks and number of rounds. Return to gentle walking before breathlessness or loss of good body positioning.
Signs of correct performance: The trunk stays upright and the knees do not lift far enough to rotate the pelvis. You can still say a short sentence.
When to stop: Stop if you develop breathlessness, chest pain or dizziness, or pain travels below the knee.
Common mistakes: Leaning forward to move faster and lifting the knees high enough to rotate the pelvis and round the back.
If this movement is difficult: March instead of jogging and shorten each interval.

Noodle Push-Down
Hold a pool noodle, a long floating foam tube, with both hands and press it gently underwater to hip level. Your abdominal and back muscles keep the trunk steady. Stop if your back or shoulder hurts.
More detailLess detail
Purpose and why it matters: This works the muscles that support the spine while you maintain your natural low-back curve against the noodle’s resistance.
Equipment and environmental safety: Choose a suitable floating foam tube with your physiotherapist. Its size affects resistance.
Water depth and flotation: Water should reach the lower tip of the sternum. Hold the foam tube to provide resistance; do not rely on it to keep you afloat.
Starting position: Place one foot slightly forward. Hold the foam tube horizontally on the surface with both hands and keep your elbows straight.
How to do it:
- Gently tighten your abdomen before moving, without holding your breath.
- Keep your elbows straight and press the foam tube slowly underwater to hip level.
- Keep the trunk still; do not lean backward or arch the low back.
- Guide the tube upward with control and repeat according to your plan.
Range, side, and limits: Lower the foam tube to hip level, no farther. Lowering it farther can make the trunk lean forward.
Amount and duration: Follow your plan for repetitions and rest. Rest before fatigue or a change in your low-back curve.
Signs of correct performance: The distance from the lower rib to the pelvis stays constant. The foam tube descends level, with both ends at the same height.
When to stop: Stop if your back or shoulder hurts during the press, or pain travels down the leg.
Common mistakes: Arching the back and leaning backward against the tube’s force, or bending the elbows instead of keeping the trunk controlled.
If this movement is difficult: Press the foam tube less deeply. If resistance remains too high, choose a more suitable device with your physiotherapist.

Arm Sculling
Move your submerged forearms forward and backward like paddles while keeping the trunk still. This works your arm and trunk muscles. Stop if your shoulder or neck hurts.
More detailLess detail
Purpose and why it matters: This works the shoulder and arm muscles while the back and abdominal muscles keep the trunk still.
Equipment and environmental safety: This version uses no equipment. Add resistance gloves only after your physiotherapist selects them and teaches you their use.
Water depth and flotation: Water should reach the lower tip of the sternum. Keep forearms and hands submerged and shoulders relaxed. No flotation device is needed.
Starting position: Stand with feet slightly wider than hip-width and knees slightly bent. Keep the natural low-back curve as in exercise five.
How to do it:
- Keep your forearms submerged near your body with palms facing forward.
- Push forward with open palms, then turn the palms to bring the hands back like paddles.
- Keep shoulders down and do not rotate the trunk with the hands; only the arms move.
- Continue for the time in your plan. Rest between rounds until arm movements are calm and regular again.
Range, side, and limits: Keep your hands within shoulder-width and your trunk facing forward throughout.
Amount and duration: Follow your plan for arm-movement time and rest between rounds. Rest before your shoulders rise or your trunk rotates.
Signs of correct performance: The pelvis and shoulders face forward without turning with the hands. Arm movement produces small ripples rather than splashing.
When to stop: Stop if your shoulder or neck hurts, or pain travels down the leg.
Common mistakes: Rotating the trunk with the hands, shrugging toward the ears and lifting the hands out of water.
If this movement is difficult: Reduce arm range, speed and the time of each round.

Interval Water Walking
Alternate faster walking with gentle walking. Keep steps short and remain able to say a short sentence. This helps build endurance. Stop for breathlessness, chest pain or dizziness.
More detailLess detail
Purpose and why it matters: Changing walking speed develops heart and lung endurance. The gentle section lets your breathing settle again.
Equipment and environmental safety: No equipment. Choose a quiet route that lets you walk out and back.
Water depth and flotation: Use water between navel level and the lower tip of the sternum, without a flotation device. Changing depth changes both buoyancy and resistance.
Starting position: As in forward walking, keep your trunk upright, shoulders relaxed and eyes forward.
How to do it:
- Walk at a comfortable speed to warm up.
- Walk a little faster while remaining able to say a short sentence.
- Return to gentle walking so your breathing becomes easier.
- Follow your plan for each section and the number of cycles; finish with gentle walking.
Range, side, and limits: Keep normal walking step length. Walk faster by taking more steps, not longer ones.
Amount and duration: Follow your plan for the faster section, gentle section and number of cycles. Remain able to say a short sentence.
Signs of correct performance: You can still say a short sentence while walking faster. The trunk does not lean forward and steps do not become longer.
When to stop: Stop if you develop breathlessness, chest pain or dizziness, or pain travels below the knee.
Common mistakes: Lengthening your steps to go faster and leaning forward during the faster section.
If this movement is difficult: Shorten the faster section and reduce the number of cycles, or use only gentle walking for now.

Deep-Water Running
With a flotation belt and trained supervision, make a running movement in deep water. Your feet stay off the floor and your face stays above water. Learn this skill with a physiotherapist first. Stop and ask for help if you feel unsafe or breathless.
More detailLess detail
Purpose and why it matters: This develops endurance without the feet contacting the floor. Muscles still exert force on the spine; spinal loading is not zero.
Equipment and environmental safety: The flotation belt must fit your body and be fastened correctly. Trained supervision and help are required; a belt does not replace swimming skills or supervision.
Water depth and flotation: Water should reach the upper chest and underarms, with the head and face fully clear. Feet do not touch the floor, and a flotation belt is required.
Starting position: Float almost upright with the water at the upper chest and underarms. Keep your head and face completely above water.
How to do it:
- Practise fitting the belt and entering safely with your physiotherapist. Find your balance beside the wall under supervision.
- Once balanced, lift one knee and move the other leg backward beneath your body.
- Move your arms with your legs and keep your head and face above water.
- Follow your plan for movement and rest. If balance becomes difficult, ask for help and return to the wall.
Range, side, and limits: Do not lift the thigh above horizontal. Keep the trunk almost upright, the natural low-back curve unchanged and the head and face fully above water.
Amount and duration: Your physiotherapist sets movement and rest duration for your skills and ability. Ask for help and finish before fatigue or difficulty keeping your face above water.
Signs of correct performance: Your body stays almost upright while you run in place. If you lean too far forward, return to the upright position.
When to stop: Stop if you feel unsafe or panicked, develop breathlessness, chest pain or dizziness, or pain travels down the leg. Ask for help and return to the wall and exit with assistance.
Common mistakes: Leaving the belt loose, leaning too far forward and entering deep water without supervision.
If this movement is difficult: Return to jogging in place or walking in shallow water. Do not practise suspended deep-water exercise before the necessary teaching and readiness.

5🗓️ How to put these exercises together
Your plan should say which exercises to do, how many times, for how long and with how much rest. Your physiotherapist adjusts these details to your assessment and response. Numbers from a study are not a prescription for every reader.
For example, the trial of 113 patients used supervised 60-minute sessions twice a week for three months. This is a research example. Your session length and progression should reflect your ability, other conditions and symptoms during and after exercise.
- Start with gentle walking and the basic movements you have learned.
- Once your balance and control are suitable, add selected stretches from level two.
- Use level-three strengthening exercises after learning correct body positioning and following your physiotherapist’s plan.
- After mastering earlier levels, choose suitable level-four movements. Deep water requires separate teaching and supervision.
- Finish with gentle walking and allow your breathing and heart rate to settle comfortably.
- If you miss a session, do not increase the next session to make up for it.
6⚠️ Warning signs: When to stop exercising
Stop exercising and leave the water with help if the following occur. Some symptoms need emergency help; do not wait for a clinic appointment. Increased pain after exercise means that your ongoing programme needs review.
- New numbness around the buttocks or between the legs, new difficulty passing urine, or a change in bladder or bowel control needs emergency help immediately. Call 115 in Iran or go to an emergency department with help.
- Seek immediate medical assessment if leg weakness is increasing, you newly cannot lift the front of your foot, or you have started falling.
- If pain travels below the knee or worsens with exercise, stop and contact your treatment team for assessment.
- Have back pain assessed before continuing if it comes with fever, chills, unexplained weight loss or persistent night pain.
- Have back pain after a fall or a recent injury assessed before returning to the pool.
- For chest pain or severe breathlessness, call for help immediately and call 115 in Iran. Stop for palpitations or dizziness as well, and leave the water with help.
- If pain the next day is still worse than before exercise, reduce the intensity or amount of exercise and review the plan with your physiotherapist. Worsening pain or pain that is not improving with the programme needs an examination.
7✅ The practical summary
Water can support part of your weight and make movement easier. Depth, speed and equipment also affect resistance. Do the movements selected for you after learning their correct technique; you do not need to do all twenty.
Start with the basics and progress according to your control and symptoms. Never exercise alone. If pain worsens or does not improve, seek review of your plan and the cause of pain. Get emergency help immediately for new numbness between the legs, changed bladder or bowel control, chest pain or severe breathlessness.
If you have questions about choosing a suitable exercise for your back, call Dr. Jalil Emad’s office at 0913 782 5207, or book an appointment online. In an emergency, do not wait for a response from the office.
To read more about non-surgical treatment of the spine, see the related service page: Non-Surgical Spine Care
Related guides: Lifestyle and home-exercise guide: Low back pain · Service page: Non-Surgical Spine Care · Also related: Neck pain
This information is for general education and does not replace an examination, medical advice or your personal treatment plan. Water depth, exercise amount and speed vary with the cause of your pain and your circumstances. Do not change your exercise plan or medicines without your treatment team. Never exercise in water alone.
8📚 Scientific sources
View the scientific sources
- Peng MS, Wang R, Wang YZ, et al. Efficacy of Therapeutic Aquatic Exercise vs Physical Therapy Modalities for Patients With Chronic Low Back Pain: A Randomized Clinical Trial. JAMA Netw Open. 2022;5(1):e2142069. doi:10.1001/jamanetworkopen.2021.42069
- Wu H, Diao P, Del Coso J, et al. In water or on land? A network meta-analysis of aquatic and land-based exercise interventions for pain and disability in chronic lower back pain. Front Med. 2026;13:1739263. doi:10.3389/fmed.2026.1739263
- Waller B, Lambeck J, Daly D. Therapeutic aquatic exercise in the treatment of low back pain: a systematic review. Clin Rehabil. 2009;23(1):3-14. doi:10.1177/0269215508097856
- Kutzner I, Richter A, Gordt K, et al. Does aquatic exercise reduce hip and knee joint loading? In vivo load measurements with instrumented implants. PLoS One. 2017;12(3):e0171972. doi:10.1371/journal.pone.0171972
- Baena-Beato PA, Artero EG, Arroyo-Morales M, Robles-Fuentes A, Gatto-Cardia MC, Delgado-Fernandez M. Aquatic therapy improves pain, disability, quality of life, body composition and fitness in sedentary adults with chronic low back pain. A controlled clinical trial. Clin Rehabil. 2014;28(4):350-360. doi:10.1177/0269215513504943
- Baena-Beato PA, Arroyo-Morales M, Delgado-Fernandez M, Gatto-Cardia MC, Artero EG. Effects of different frequencies (2-3 days/week) of aquatic therapy program in adults with chronic low back pain. A non-randomized comparison trial. Pain Med. 2013;14(1):145-158. doi:10.1111/pme.12002
- Rosenstein B, Montpetit C, Vaillancourt N, et al. Aquatic exercise versus standard care on paraspinal muscle morphology and function in chronic low back pain patients: a randomized controlled trial. Sci Rep. 2025;15:15798. doi:10.1038/s41598-025-00210-3
- Hayden JA, Ellis J, Ogilvie R, Malmivaara A, van Tulder MW. Exercise therapy for chronic low back pain. Cochrane Database Syst Rev. 2021;9(9):CD009790. doi:10.1002/14651858.CD009790.pub2
- Centers for Disease Control and Prevention. Preventing Swimming-related Illnesses. https://www.cdc.gov/healthy-swimming/safety/index.html
- Centers for Disease Control and Prevention. Preventing Diarrheal Illnesses. https://www.cdc.gov/healthy-swimming/prevention/preventing-diarrheal-illnesses.html
- Worcestershire Acute Hospitals NHS Trust. Hydrotherapy exercise sheet: back/core. https://www.worcsacute.nhs.uk/leaflets/hydrotherapy-exercise-sheet-back-core-pd/
- University Hospitals Plymouth NHS Trust. Hydrotherapy Exercises. https://www.plymouthhospitals.nhs.uk/display-pil/pil-hydrotherapy-exercises--5927
- Royal Cornwall Hospitals NHS Trust. Hydrotherapy. https://royalcornwallhospitals.nhs.uk/services/hydrotherapy/
- NHS. Back pain. https://www.nhs.uk/conditions/back-pain/