
On this page
🧭 Pick your situation
This guide comes in separate versions for different situations; read the one that matches yours.
Low Back Pain Over 50 Without Disc Involvement: Daily Routines and Exercises
A practical guide for degenerative low back pain over 50: gentle mornings, pacing, a strength-plus-balance programme, bone health, gym principles, and red flags.
13 min read
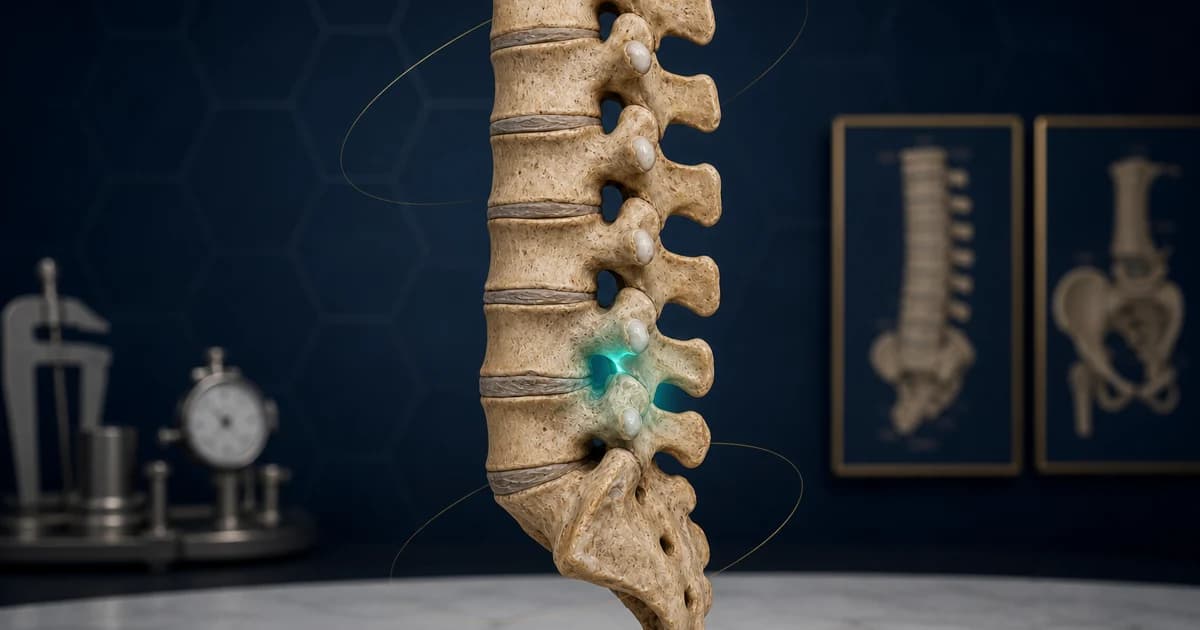
This version is for you if you are over 50 and your back pain comes from the natural wear of the joints and discs of the lower back, with no pressure on a nerve root. At this age, regular movement is the best lubricant for your joints, and inactivity is their worst enemy. This article is general education and does not replace an examination; with severe symptoms or warning signs, see a doctor first.
1🦴 What is this condition, and what does your version mean?
With age, the discs lose some of their water content and the small joints behind the vertebrae (the facet joints) develop wear; the result is back pain that usually starts with morning stiffness, eases with light activity, and builds up again with prolonged standing or work. These changes show up on imaging in most people your age and are not a disease in themselves; that is why imaging is only needed when there are warning signs or pain that resists treatment. In your version, two extra topics matter: bone health (osteoporosis is silent) and preventing falls. The treatment path is what the guidelines recommend: staying active, regular exercise, and correcting habits; medication and physiotherapy are complements, and decisions about them require an examination.
2🏠 Daily routines you should adjust
🌅 Start the day gently
Morning stiffness is normal; before heavy tasks, a few minutes of gentle movement and a warm shower prepare the joints.
More detailLess detail
- While still in bed, gently bring your knees to your chest a few times and rock the pelvis, then get up.
- Leave tasks that involve bending (tying shoelaces, putting on socks) until after your body has warmed up.
⏱ Split up the tasks, don't drop them
Do gardening, moving things, and cleaning in several short sessions with rests in between; the secret to keeping going is splitting the work up.
More detailLess detail
- A simple rule: rest before the pain flares up, not after; for example, a few minutes' break after every 20 to 30 minutes of work.
- Spread heavy tasks across the days of the week and avoid doing them all on a single day off.
🛒 Lift loads safely and split them
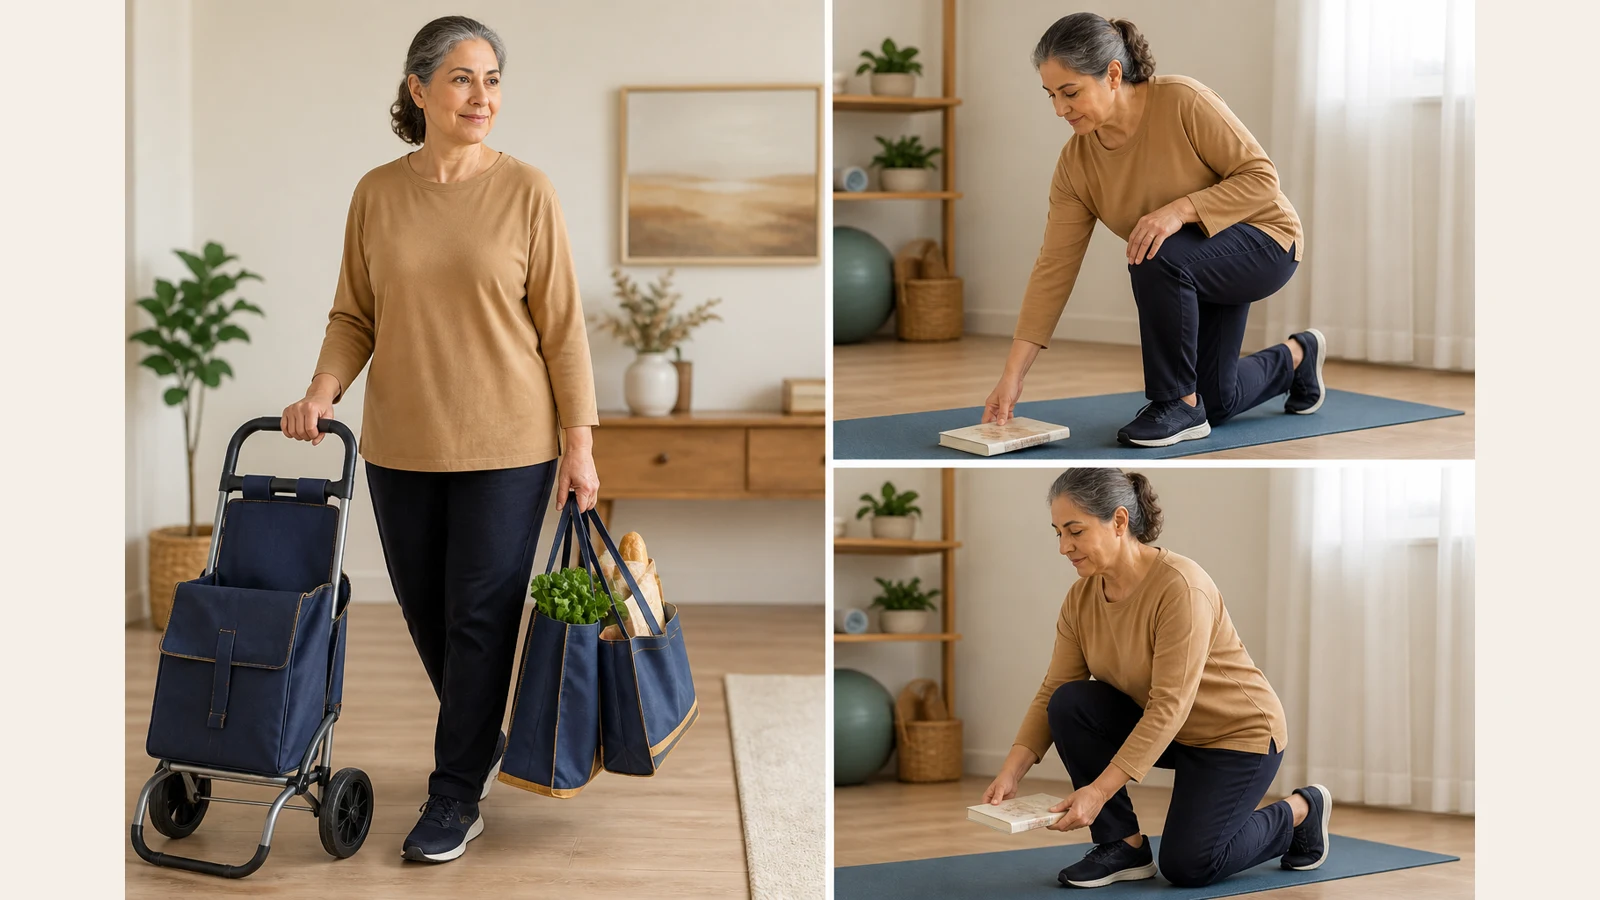
Lift shopping and objects with bent knees and the load held close to your body, and split it between both hands; avoid twisting your back while carrying a load.
More detailLess detail
- Make the shopping bags lighter and use more of them; a shopping trolley is your back's best friend.
- Even to pick up something light from the floor, step one foot back and lower yourself with a bent knee instead of bending over suddenly.
🏡 Fall-proof your home
At this age, a simple fall can fracture a weakened vertebra; fall prevention is part of your back-pain treatment.
More detailLess detail
- Secure the edges of rugs, clear cables out of walkways, and make sure the stairs and bathroom are well lit.
- Wear closed-toe slippers with a grippy sole and use a non-slip mat in the bathroom.
🦴 Keep track of your bone health
Osteoporosis progresses silently, and sudden back pain after a minor strain can be its first sign.
More detailLess detail
- Talk to your doctor about bone density testing and whether you need calcium and vitamin D; taking supplements on your own is not recommended.
- According to the international recommendations, the best exercise for bone is a combined "resistance + balance" program, not walking alone; the exercise section is arranged on exactly that basis.
⚖️ Manage your weight and sleep
Extra weight adds load to worn joints, and poor sleep lowers your pain threshold.
More detailLess detail
- Sleep on your side with a pillow between the knees, or on your back with a pillow under the knees; the mattress should be even and medium-firm.
- Gradual weight loss through small sustainable changes (cutting sugary drinks, daily walking) works better than harsh diets.
3🏋️ Home exercises
Exercise is the most effective proven treatment for chronic low back pain, and at your age it has two missions at once: calming the back and protecting bone and balance. Do the exercises within a range that causes no sharp pain. The doses are common exercise-therapy ranges, and your care team may adjust them.
Daily Walking (Daily Walking)
In a large trial, regular walking delayed the recurrence of back pain. Start with 5 to 10 minutes and build up slowly to about 30 minutes a day. Stop if you get chest pain, shortness of breath, or dizziness.
More detailLess detail
Purpose and rationale: Rhythmic movement lubricates worn joints and also helps manage mood and weight.
Starting position: Comfortable shoes with a grippy sole; a smooth, well-lit route; if you feel unsteady, take a companion or a cane.
Step-by-step execution:
- For the first two weeks, walk 5 to 10 minutes a day at a comfortable pace.
- Add a few minutes each week until you reach about 30 minutes.
- On a bad day, halve the distance but do not skip it.
Documented dose: The recurrence-prevention program's target: about 30 minutes, 5 days a week, with a slower rate of increase appropriate to your age.
Stop immediately if: Chest pain, unusual shortness of breath, dizziness, or sharp pain in the back or leg.
Common mistakes: Starting too fast after a long period of inactivity; an uneven, poorly lit route.
Easier version: Several 5-minute sessions spread over the day, or walking around the house.
Pelvic Tilt (Pelvic Tilt)
A small, safe movement to wake up the deep abdominal muscles and loosen the back. 8 to 10 repetitions with a short hold, 1 to 2 sets a day. Stop if you feel sharp pain.
More detailLess detail
Purpose and rationale: Gentle control of the pelvis and abdomen is the foundation of all the later exercises and of everyday movements.
Starting position: On your back, knees bent, feet flat on the floor.
Step-by-step execution:
- As you breathe out, draw the belly in slightly and gently flatten the hollow of your back toward the floor.
- Hold for 5 seconds without holding your breath.
- As you breathe in, slowly return to the natural position.
Documented dose: 8 to 10 repetitions, 1 to 2 sets a day.
Stop immediately if: Sharp back pain or pain radiating into the leg.
Common mistakes: Pushing with the legs instead of the abdomen; holding your breath.
Easier version: The same movement with a smaller range, or seated on a chair.
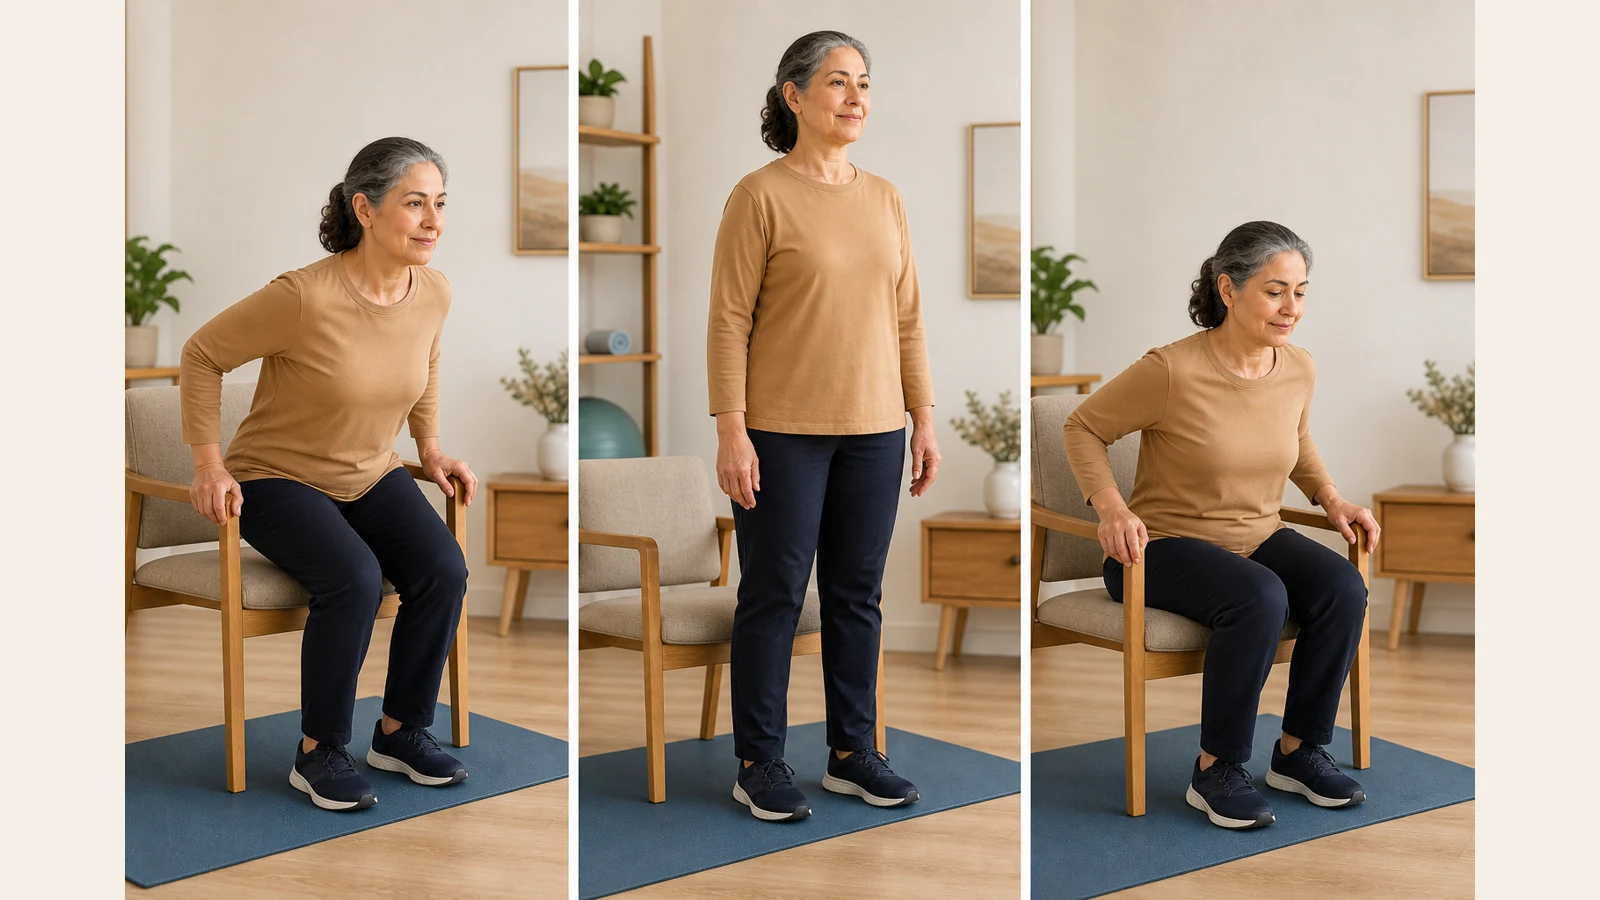
Sit-to-Stand (Sit-to-Stand)
The most powerful "exercise for life": strengthening the legs and buttocks with the very movement you perform dozens of times a day. 5 to 10 repetitions, 2 sets. Stop if your knee or back gets sharp pain.
More detailLess detail
Purpose and rationale: Strong legs mean standing up without straining the back and a lower risk of falling; this exercise is the safe "squat" for your age.
Starting position: Sit on a sturdy chair of normal height; feet hip-width apart, slightly behind the knees.
Step-by-step execution:
- Lean slightly forward ("nose over toes") and push up through your legs to stand.
- Stand fully upright at the top and pause for a moment.
- Sit back down slowly and with control; do not drop into the chair.
Documented dose: 5 to 10 repetitions, 2 sets, 3 days a week (a common pattern in resistance training for older adults).
Stop immediately if: Sharp knee or back pain, or dizziness on standing up.
Common mistakes: Always pushing up with the hands; sitting down in a free fall.
Easier version: A higher chair or an added cushion; light help from the hands on the armrests.
Gentle Glute Bridge (Gentle Glute Bridge)
Strengthening the buttocks through a controlled range so that load is taken off the back. 6 to 10 repetitions, 2 sets. Stop if the pain concentrates in your back.
More detailLess detail
Purpose and rationale: Strong buttocks make walking and climbing stairs safe.
Starting position: On your back, knees bent, feet flat on the floor.
Step-by-step execution:
- Tighten the belly slightly so the back does not over-arch.
- Lift the pelvis to a comfortable line (not the maximum).
- Pause for 2 seconds and lower slowly.
Documented dose: 6 to 10 repetitions, 2 sets.
Stop immediately if: Sharp back pain or severe cramping in the back of the thigh.
Common mistakes: Lifting the pelvis too high; rushing the way down.
Easier version: Just squeezing the buttocks without lifting the pelvis.
Standing Hip Abduction (Standing Hip Abduction)
Strengthening the muscles at the side of the hip, which are the pillars of balance when walking. 8 to 10 repetitions per leg, 2 sets, holding the back of a chair. Stop if you feel hip or back pain.
More detailLess detail
Purpose and rationale: With every step, these muscles keep the pelvis level; when they are weak, you wobble and load your back.
Starting position: Stand behind a chair, hands on its back, standing tall.
Step-by-step execution:
- Move one leg straight and slowly out to the side; keep the toes pointing forward.
- Pause for a moment; the trunk must not lean to the opposite side.
- Bring it back slowly, and switch legs after finishing the set.
Documented dose: 8 to 10 repetitions per leg, 2 sets.
Stop immediately if: Sharp hip or back pain, or a feeling of instability.
Common mistakes: Leaning the trunk; rotating the toes upward.
Easier version: A smaller range, or doing the movement lying on your side.
Supported Single-Leg Balance (Supported Single-Leg Balance)
Balance training, per the bone-health recommendations, is the second half of your program: standing on one leg for 10 to 20 seconds next to a support, 3 times per leg. Stop if you feel dizzy.
More detailLess detail
Purpose and rationale: Better balance means fewer falls and healthier vertebrae; for bone it matters as much as strength training.
Starting position: Stand next to a table or the back of a chair and keep one hand close to the support.
Step-by-step execution:
- Shift your weight onto one leg and lift the other slightly off the floor.
- Hold for 10 to 20 seconds, standing tall.
- Switch legs; as you improve, lighten the support of your hand.
Documented dose: 3 holds of 10 to 20 seconds per leg, preferably daily.
Stop immediately if: Dizziness, vision blacking out, or severe unsteadiness.
Common mistakes: Practicing far from a support at the start; looking down.
Easier version: Just narrowing your stance (heel in front of toes) with both hands on the support.
4🏟️ Principles of training at the gym
Resistance training at your age is not just allowed — according to the bone-health recommendations it is strongly advised; with these principles:
- Start with machines, not free weights; the path of movement is controlled and the risk of form errors is lower.
- 2 to 3 sessions a week, for the large muscle groups (legs, buttocks, back, chest), with a weight that allows 8 to 12 repetitions with good form.
- Aerobic exercise alone is not enough; the program must also include resistance and balance work.
- Progress the load more slowly than younger people would, and leave a rest day between sessions.
- If you have osteoporosis or suspect you do, coordinate the program with your doctor.
5⚠️ Warning signs — see a doctor immediately
These signs mean close this article and get seen today:
- Sudden severe back pain after a fall or even a minor strain (a cough, lifting something light) — possible vertebral fracture
- Incontinence or retention of urine or stool, or numbness in the genital area
- Progressive leg weakness or numbness that is spreading
- Constant night pain that does not settle with rest
- Fever, unexplained weight loss, or a history of cancer
- Loss of height or a progressive stoop
6✅ Summary and next step
A worn back is a back that has worked — not a back that is finished. With a gentle start to the day, splitting up tasks, daily walking, and this article's "strength + balance" program, you will both manage the pain and insure your bone and balance. If the pain is not improving, or you notice a warning sign, an examination is needed.
If you have questions about your own back or bone health, book an appointment for a personal assessment.
To learn more, see the spine care page and the bone health page.
This content is provided for general education only and does not replace an examination and the opinion of your doctor. If you have warning signs, or the pain does not improve with these adjustments within a few weeks, get examined before continuing the exercises. Adjust the intensity and type of exercise to your own condition and your care team's advice.
View scientific sources
- Hayden JA, et al. Exercise therapy for chronic low back pain. Cochrane Database Syst Rev. 2021. doi.org/10.1002/14651858.CD009790.pub2
- Pocovi NC, et al. An individualised, progressive walking and education intervention for the prevention of low back pain recurrence (WalkBack): a randomised controlled trial. Lancet. 2024. doi.org/10.1016/S0140-6736(24)00755-4
- Giangregorio LM, et al. Too Fit To Fracture: exercise recommendations for individuals with osteoporosis or osteoporotic vertebral fracture. Osteoporos Int. 2014. doi.org/10.1007/s00198-013-2523-2
- Bailly F, et al. Clinical guidelines and care pathway for management of low back pain with or without radicular pain. Joint Bone Spine. 2021. doi.org/10.1016/j.jbspin.2021.105227
- Apeldoorn AT, et al. Management of low back pain and lumbosacral radicular syndrome: the KNGF Guideline. Eur J Phys Rehabil Med. 2024. doi.org/10.23736/S1973-9087.24.08352-7
- Hutchins TA, et al. ACR Appropriateness Criteria: Low Back Pain, 2021 Update. J Am Coll Radiol. 2021. doi.org/10.1016/j.jacr.2021.08.002

Dr. Jalil Emad
Orthopedic specialist and surgeon, board-certified in bone and joint surgery; years of experience in knee and hip replacement, sports injuries and arthroscopy in Isfahan.
Related articles

Total Knee Replacement: The Pre-Operative Guide
What to know before knee replacement: what knee osteoarthritis is, what happens if you do not operate, how to prepare, what takes place in the operating room, and answers to 20 questions about returning to daily life.
Carpal Tunnel Release Surgery: Wound Care and Finger Movement
A short, evidence-based guide to the first days after carpal tunnel release—from the dressing, showering and warning signs to finger movement, returning to work and common questions.
Latarjet Shoulder Surgery: Postoperative Care and Rehabilitation
A complete, criteria-based guide to surgery day and care after Latarjet shoulder surgery—from wound care, sling use, medicines, and warning signs to the first 90 days of rehabilitation and a safer return to activity.