
On this page
🧭 Pick your situation
This guide comes in separate versions for different situations; read the one that matches yours.
Neck Pain Over 50 Without Arm Symptoms: Daily Routines and Exercises
A practical guide to degenerative neck pain over 50: gentle mornings, desk and glasses setup, nine routines, nine home exercises including balance, bone health, and red flags.
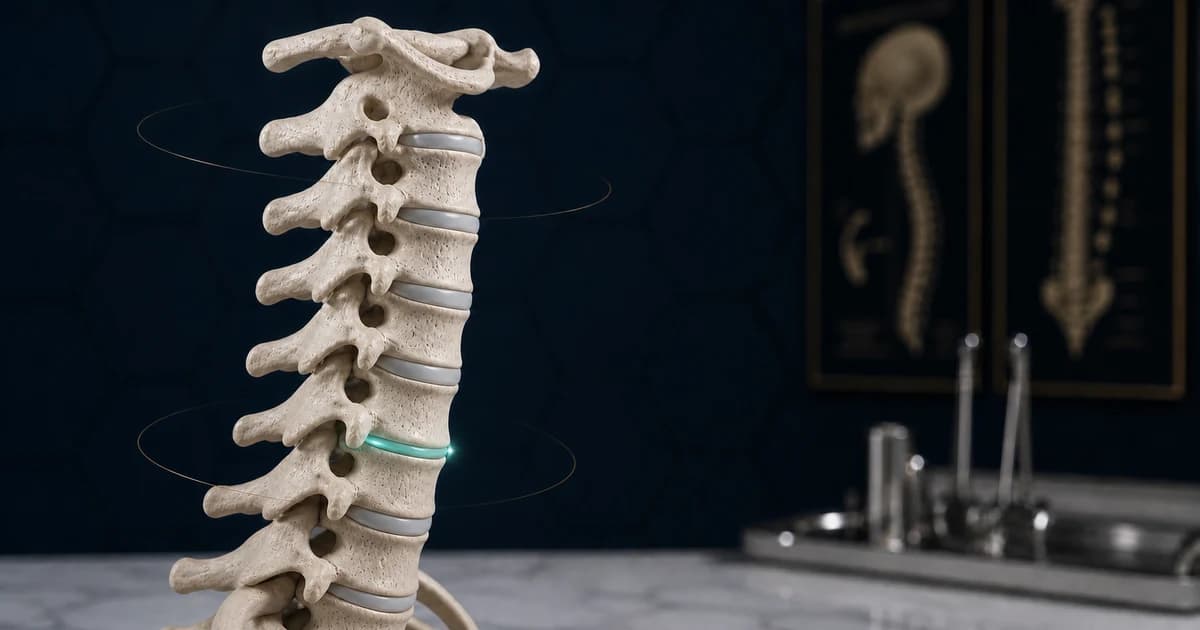
This version is for you if you are over 50 and neck pain and stiffness are troubling you, but the pain does not shoot down into the arm and you have no numbness or weakness in the hand. At this age, part of the story is the natural wear-related changes of the neck, and the right program is a combination of correcting habits, resistance training, and looking after bone health. This article is general education and is not a substitute for an examination; with severe symptoms or warning signs, get seen first.
1🦴 What is this condition, and what does your version mean?
As age advances, the discs of the neck lose some of their water content and become shorter, and the small joints at the back (the facets) and the ligaments become thicker. This set of changes is called "cervical spondylosis", and it is seen on the imaging of most people your age, even in those who have no pain at all; so it is not a disease in itself, but the natural face of passing time. The pain pattern it creates is usually familiar: in the morning the neck is dry and stiff and loosens up after a few minutes of movement, turning the head has become more limited than before — when reversing the car, for example — and the pain gets better with light activity and worse with holding the head up for a long time.
In your version there is no sign of pressure on a nerve root: the pain does not shoot down into the arm and forearm, and your hand does not become numb or weak. Two extra subjects are serious at this age: bone health, and avoiding high-risk manipulation of the neck. The core of the treatment, though, is the same one the clinical guidelines state: staying active, exercising regularly, and correcting everyday habits — not prolonged rest and not a collar. Imaging is only worth discussing when warning signs are present or when the pain stays resistant despite several weeks of the right program.
2🏠 Daily routines you should adjust
🌅 Start the day gently
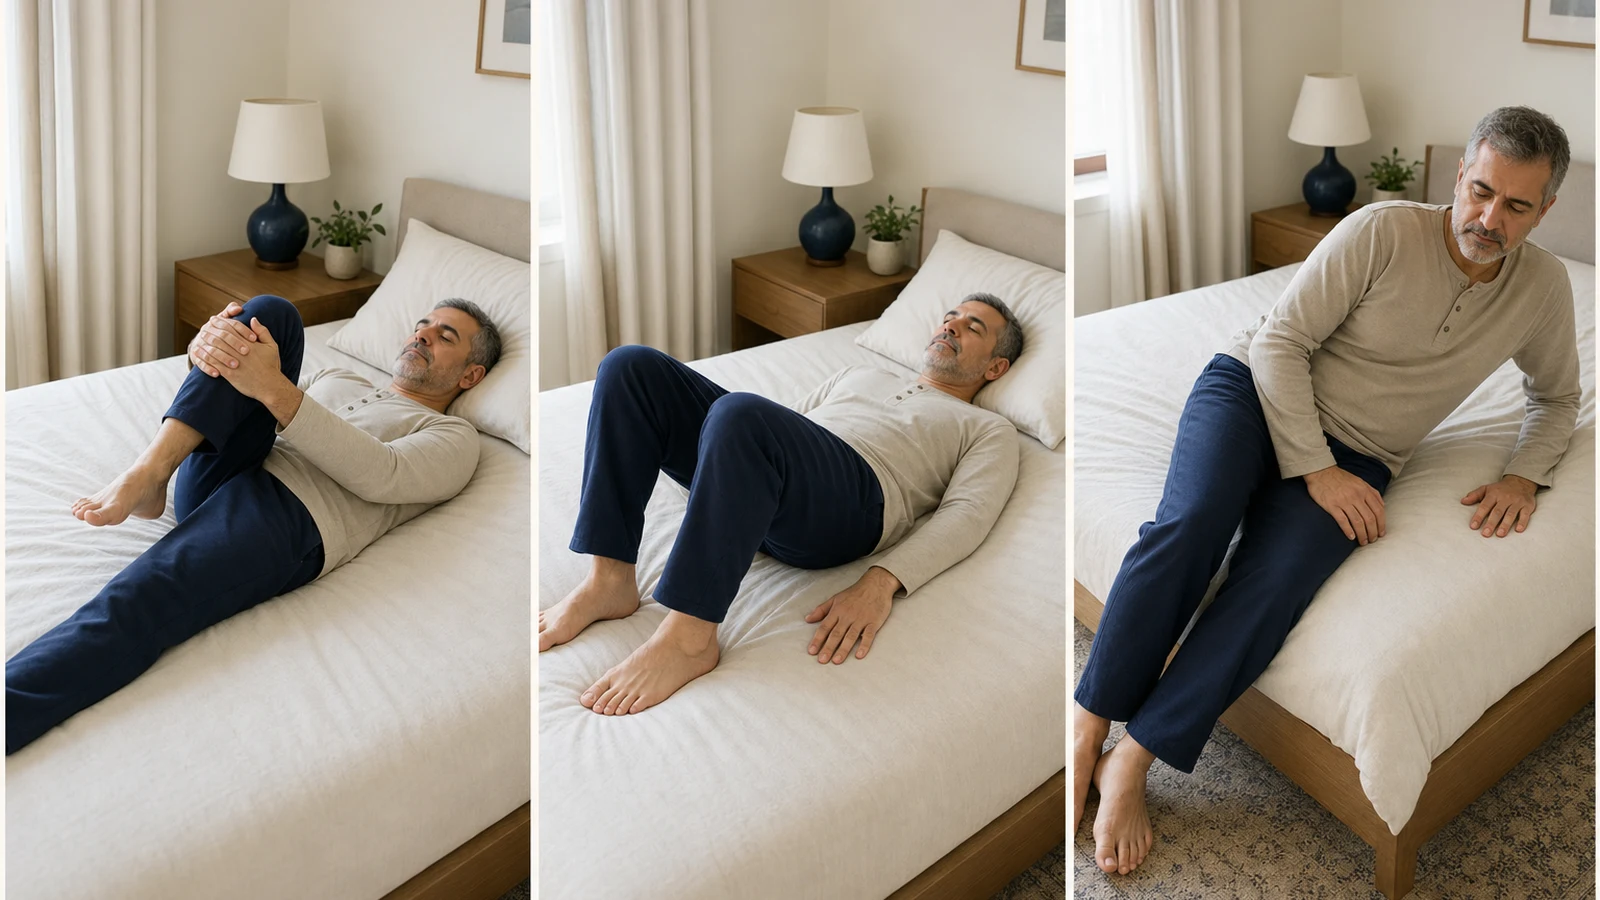
In a worn neck, morning stiffness is normal and does not mean things are getting worse; the joint has spent the night without moving. While you are still in bed, turn your head gently to both sides and bring your ear toward your shoulder, then take a warm shower. The sign of a proper start to the day is that the stiffness loosens within the first half hour, rather than staying until noon.
More detailLess detail
- Do not get out of bed in one movement; first roll onto your side, bring your legs down over the edge of the bed, and sit up with the help of your arm.
- Leave heavy and overhead tasks until after your body has warmed up; that difference alone reduces the pain in the evening.
- If the morning stiffness lasts more than an hour or comes together with swelling in several other joints, raise it at your visit.
💻 Set up the screen and your glasses together
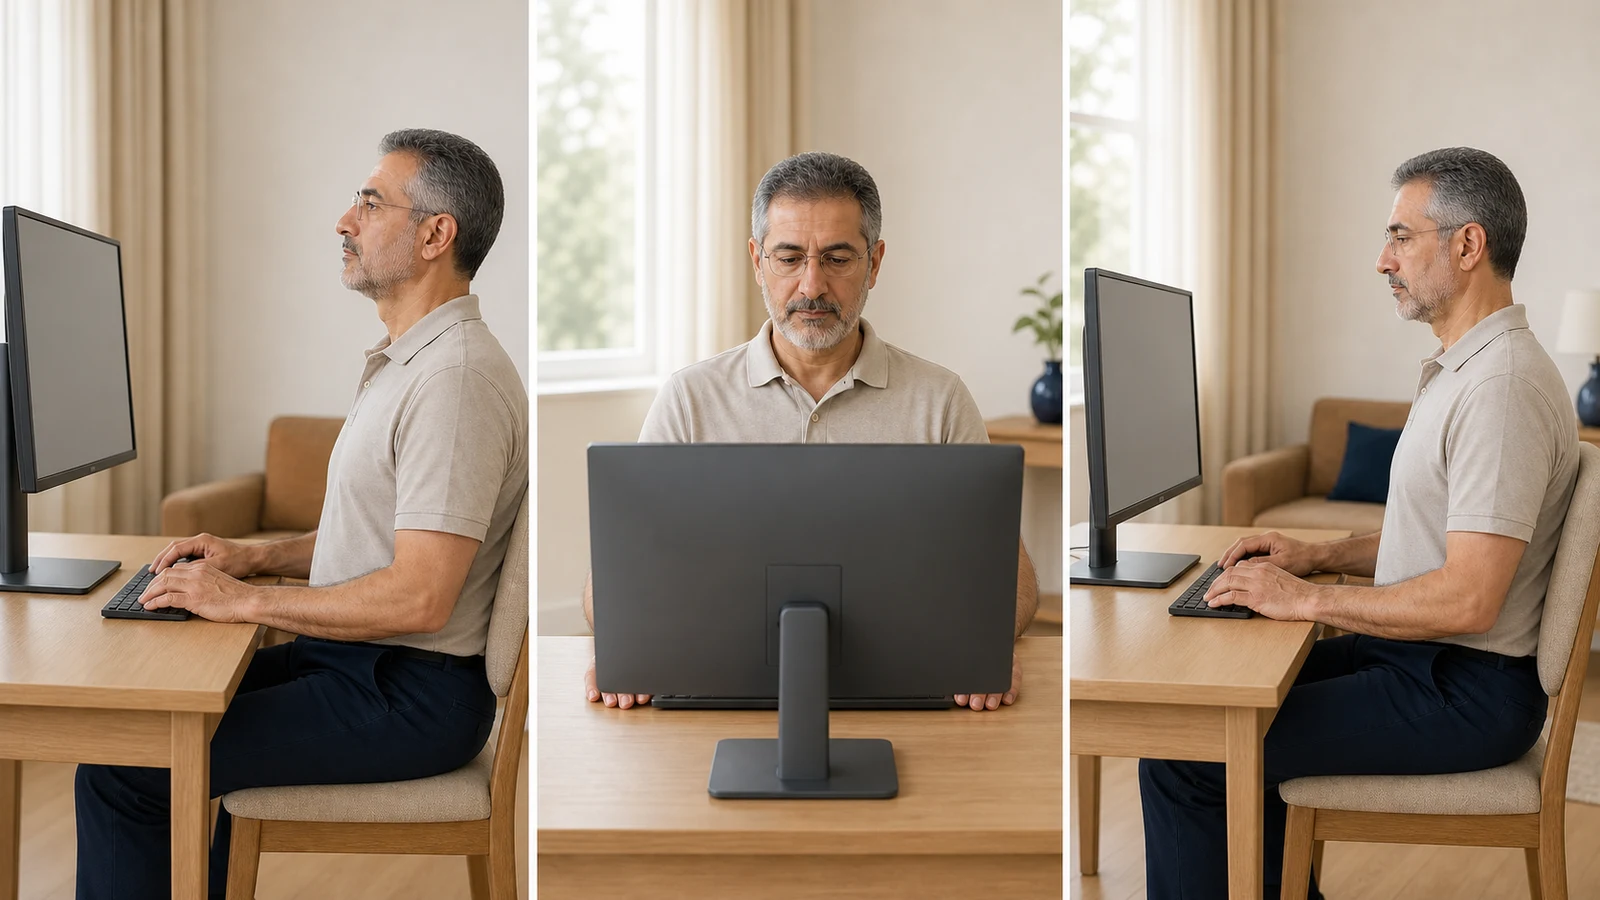
Two things act on your neck at the same time: the height of the monitor and your glasses. The top edge of the screen should be level with your eyes, but with bifocal or progressive lenses most people tip the head back in order to read the text through the lower part of the lens — exactly the position that loads the joints at the back of the neck. The sign of a correct setup is that after half an hour of work your chin is neither pinned to your chest nor is your head tipped up.
More detailLess detail
- Tell your eye doctor that most of your working hours are spent at a computer; glasses made for the intermediate distance solve many of the stubborn neck pains at this age.
- With progressive lenses, bring the monitor a little lower so that you do not have to hold your head up.
- Make the on-screen font larger and place the monitor directly in front of you; the easier the reading, the less the neck stays in a forced position.
📱 Bring the phone up, not the head down
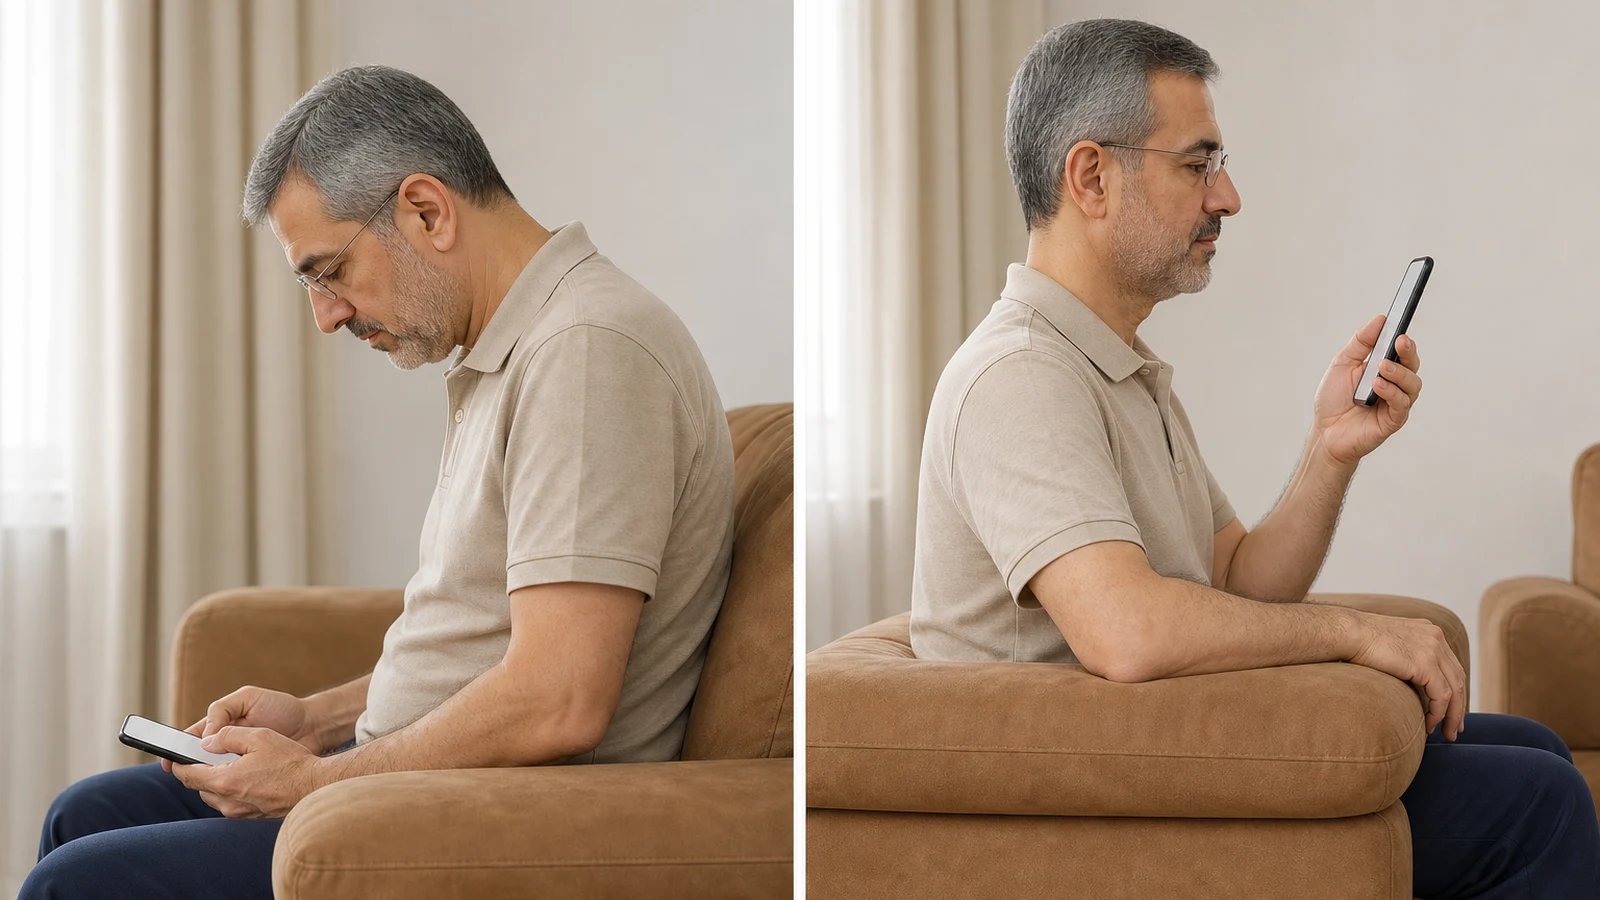
Every time you bend your head to look at your phone, the load on the muscles and joints at the back of the neck multiplies, and in a neck that has wear-related changes this repeated load turns into pain sooner. The solution is simple: bring the phone up close to your line of sight and rest your elbow against your body or on the arm of the sofa. The sign that you are doing it right is that your eyes go down but your chin does not touch your chest.
More detailLess detail
- For long calls use the speaker or a headset; holding the phone between shoulder and ear is the worst position of all.
- Make the phone font larger, and for long texts move to a tablet on a stand.
- Long reading on the phone in bed creates the same pattern; put a small cushion under your elbow so the hand stays up and the neck does not bend.
⏱ Break overhead work into pieces
Painting the ceiling, putting up curtains, and tidying the upper shelves keep the neck tipped up for minutes at a time, and that position produces the most pain in spondylosis. Instead of finishing the job in one go, divide it into short spells of a few minutes and bring the neck back to neutral in between. The sign of a good split is that on the evening of that same day and the next morning your neck is no stiffer than usual.
More detailLess detail
- Use a stool or a short ladder so the work falls lower than your head and the neck tips back less.
- A long-handled tool such as a paint roller takes a large part of overhead work away from the neck.
- Hand jobs that need a tall ladder to someone else; the risk of a fall matters more than neck pain.
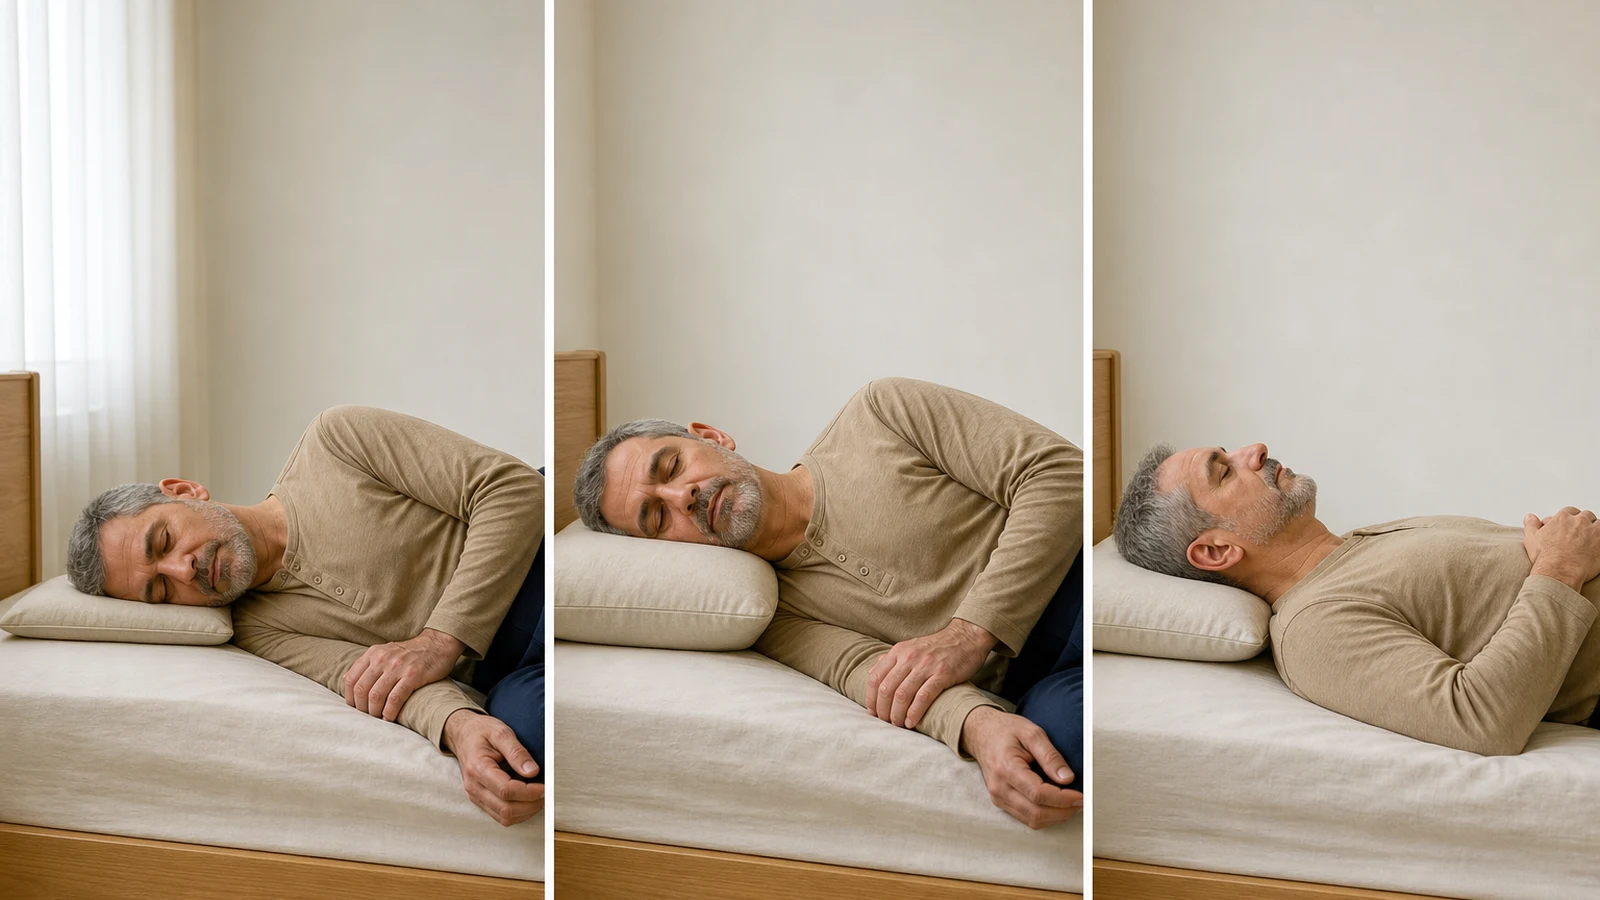
🛏 Get the pillow and the sleeping position right
You spend a third of the day and night in a position you choose yourself, and in a worn neck an unsuitable pillow can undo what the day's exercise achieved. The goal is simple: keep the neck in line with the spine — on your side a pillow as thick as the distance from shoulder to ear, and on your back a thinner one. The sign of a right choice is that in the morning your neck is not stiffer than it was the night before.
More detailLess detail
- Sleeping on your stomach is the worst position for the neck because it keeps the head fully turned for hours; practice sleeping on your side by placing a long pillow along your body.
- Two pillows stacked on each other, or one very tall pillow, repeats the same forward-head position of the desk all night long.
- No pillow "cures" spondylosis; the criterion is how comfortable you are in the morning, not the claim on the box.
🚗 Take driving and the headrest seriously
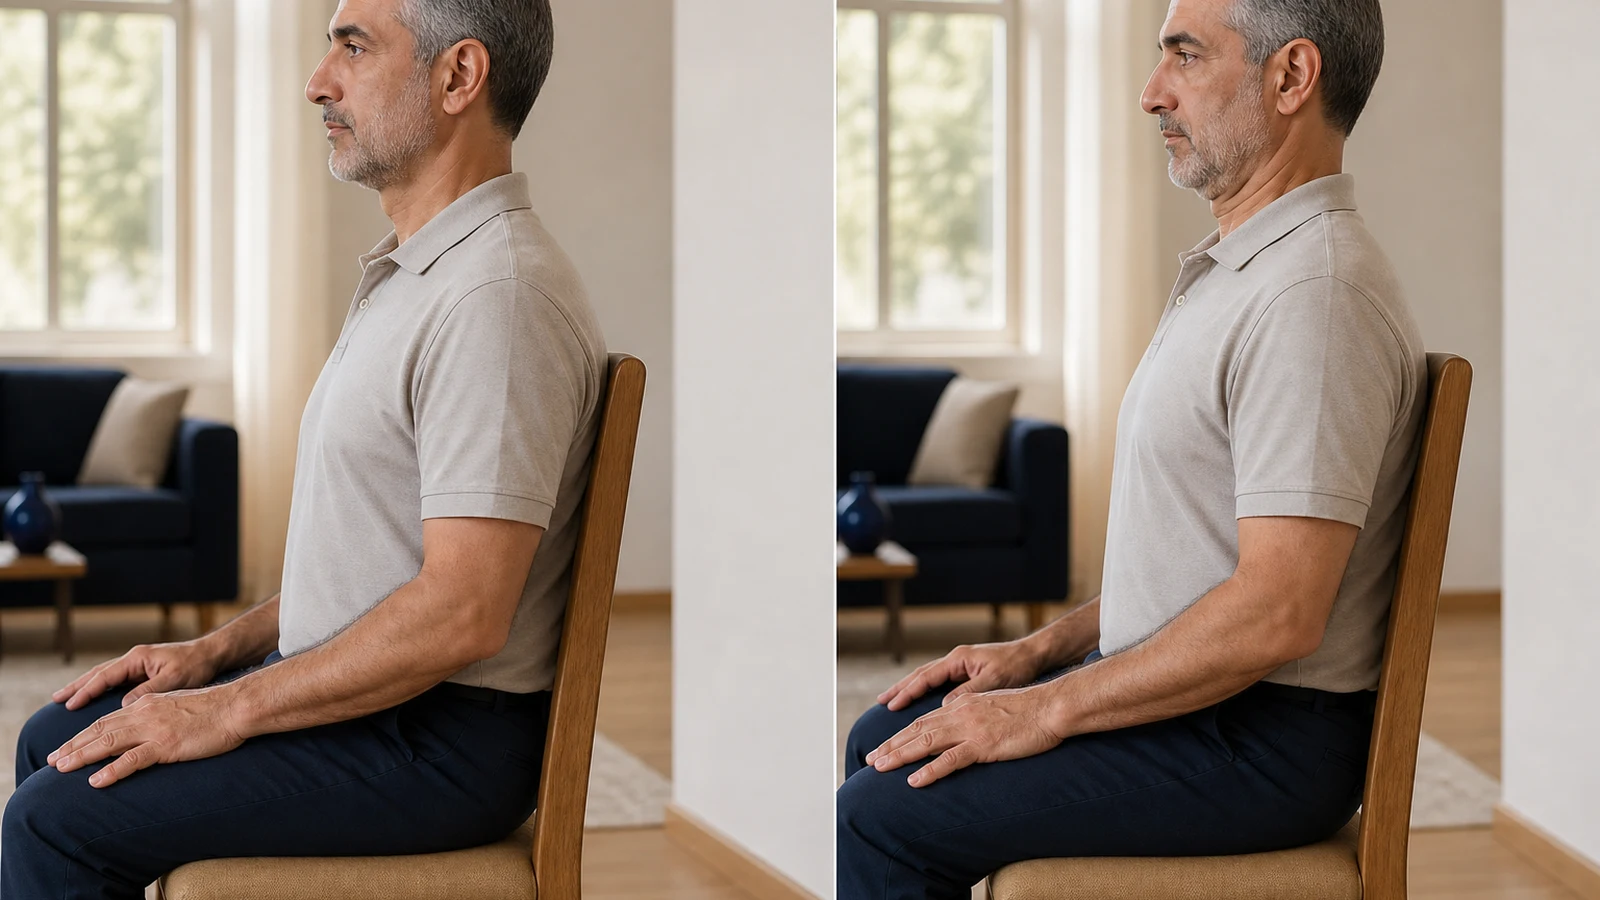
When you drive, the neck stays almost still for hours, and a badly adjusted headrest is dangerous in a sudden braking; set the backrest close to upright and put the top edge of the headrest level with the top of your head. The point specific to this age is the limited rotation of the neck, which makes reversing difficult: instead of forcing the neck, use the mirrors and the rear camera and turn your whole trunk. The sign of a correct adjustment is that the back of your head is only a few centimeters away from the headrest.
More detailLess detail
- Set the side mirrors a little wider so that the blind spot gets smaller.
- Never turn the neck to the end of its range and with force; turning the trunk gives you the same view with less load.
- If your neck rotation has become so limited that driving is no longer safe, be sure to raise it at your visit.

🤕 Keep a record of cervicogenic headache and positional dizziness
If your headache starts from the back of the neck and the back of the head, is usually one-sided, and gets worse with hours of still work, "cervicogenic headache" is a possibility — a headache that gets better when the neck is treated. If you feel dizzy when you turn or raise your head, be sure to say so at your visit and never choose a medicine or a corrective movement for it yourself. The sign that you are on the right path is that as the neck gets better, the number of headache days falls too.
More detailLess detail
- For every headache, write down what time it started, how many hours it lasted, and which side it was on.
- A review of the studies shows that exercise therapy for the neck and shoulder blade reduces the intensity and the number of cervicogenic headaches.
- Frequent painkiller use can itself create headaches; if you take painkillers more than a few days a week, say so.
🦴 Follow up on bone health
Osteoporosis is silent: until a fracture happens it causes no pain, and over 50 it has to be followed up actively. At your visit, ask about bone density measurement and about your calcium and vitamin D status, and do not start any supplement on your own. The sign that you have taken this seriously is that you have a clear answer to "when was my bone status last checked?"
More detailLess detail
- The international recommendation for people who have osteoporosis or are at risk of it is a combination of resistance and balance training, not walking alone.
- Tell your doctor about a fracture from a minor knock, a loss of height, or an increasing hunch of the upper back; these can be signs of a silent vertebral fracture.
- Smoking and inactivity make bone weaker; changing them matters as much as any medicine does.
⚠️ Do not crack your neck and do not hand your neck to just anyone
The habit of self-cracking the neck with a quick twist gives a moment of relief, but that same fast movement at the end of the range is exactly what is not recommended in a worn neck. More important than that, do not let anyone without training and an examination "put your neck back in place"; the decision about manual therapy is made after an examination. The sign that you are free of this habit is that when you feel stiffness you go for gentle neck movement instead of cracking it.
More detailLess detail
- Every time the urge to crack comes, do a few chin tucks or gentle neck movements instead.
- Drop full circular rotation of the neck as a "warm-up".
- If manual therapy or physiotherapy is proposed, tell the therapist about any history of osteoporosis and about any dizziness.
3🏋️ Home exercises
The Cochrane systematic review makes one point clearly: in chronic neck pain, stretching on its own has no useful effect, and what does work is strengthening the muscles of the neck, shoulder blade, and shoulder. At your age one more layer is added: the program has to be resistance and balance work, not only aerobic — which is exactly what the international bone health recommendations say. Do the exercises within a range that is free of sharp pain; the doses are the ranges commonly used in exercise therapy, and your care team can change them for you.
Chin Tuck (Chin Tuck)
The most basic exercise in this article: without bending the neck, draw the chin slightly back. 10 repetitions with a 5-second hold, 2 to 3 times a day. Stop immediately with sharp pain or dizziness.
More detailLess detail
Purpose and why it matters: it wakes up the deep muscles that hold the neck — the very ones that switch off in the forward-head position and hand their load to the worn joints at the back of the neck.
Starting position: seated with a straight back and relaxed shoulders; looking straight ahead.
Step by step:
- Draw the chin gently back, as if you wanted to make a small double chin; the head must not bend downward.
- Keep your gaze on the same horizontal level, and let the back of the neck feel a gentle stretch.
- Hold for 5 seconds and release slowly.
Documented dose: 10 repetitions with a 5-second hold, 2 to 3 times a day (the common range for deep neck muscle training).
Stop immediately if: sharp neck pain, dizziness, or any shooting or tingling toward the arm.
Common mistakes: bending the head down instead of drawing the chin back; holding the breath; sharp pressure.
Easier version: the same movement lying on your back, where the weight of the head rests on the mattress.
Neck Movement Within a Comfortable Range (Cervical Range of Motion)
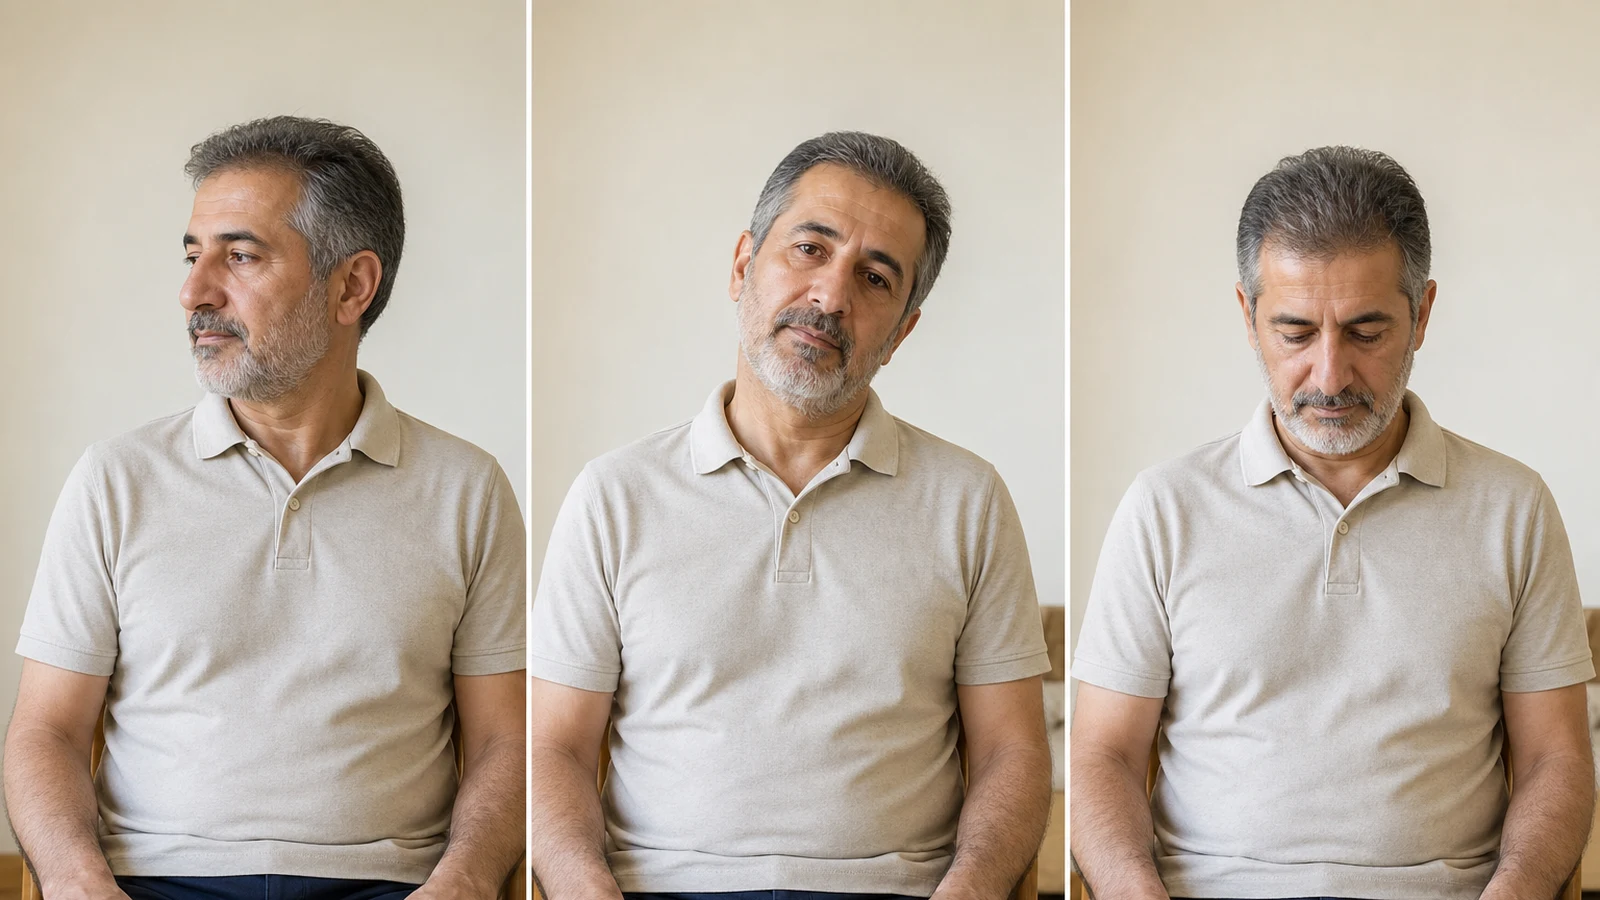
Turning to the left and right, bending to the sides, and gently bending forward — all within a completely pain-free range. 5 repetitions in each direction, 1 to 2 times a day. Stop immediately with dizziness or sharp pain.
More detailLess detail
Purpose and why it matters: a neck that stays still out of fear of pain becomes stiffer; gentle daily movement is the best tool for keeping the range you still have.
Starting position: seated with a straight back; the best time is after the warm shower in the morning.
Step by step:
- Turn the head gently to the right as far as is comfortable, pause briefly, and then to the left.
- Tilt your ear toward each shoulder, without lifting the shoulder up.
- Bring the head slightly down and return to neutral; tipping the head back is not necessary.
Documented dose: 5 repetitions in each direction, 1 to 2 times a day (the common range for range-of-motion exercise).
Stop immediately if: dizziness, blurred or double vision, sharp pain, or symptoms spreading into the arm.
Common mistakes: full circular rotation of the neck; going to the end of a painful range; performing the movement quickly.
Easier version: half the range and fewer repetitions.
Isometric Neck Strengthening in Four Directions (Isometric Neck Holds)
Press your palm against your forehead, the back of your head, and each side of your head, and resist with the neck without letting the head move. 5 seconds in each direction, 5 repetitions, once a day. Stop immediately with sharp pain or dizziness.
More detailLess detail
Purpose and why it matters: a static contraction strengthens the neck muscles without moving the joints; for a worn neck it is the safest form of strengthening.
Starting position: seated with a straight back, the head in a neutral position and looking straight ahead.
Step by step:
- Place your palm on your forehead and press gently, while the neck resists and the head stays still.
- Repeat the same thing with the hand behind the head, and then with the palm on each side of the head.
- 5 seconds in each direction; the pressure should be gentle and without holding the breath, not maximal.
Documented dose: 5 repetitions in each direction, once a day (the common range for isometric neck exercise).
Stop immediately if: sharp pain, dizziness, or symptoms spreading into the arm.
Common mistakes: maximal pressure; holding the breath; letting the head move.
Easier version: very light pressure and a duration of 3 seconds.
Upper Trapezius Stretch (Upper Trapezius Stretch)
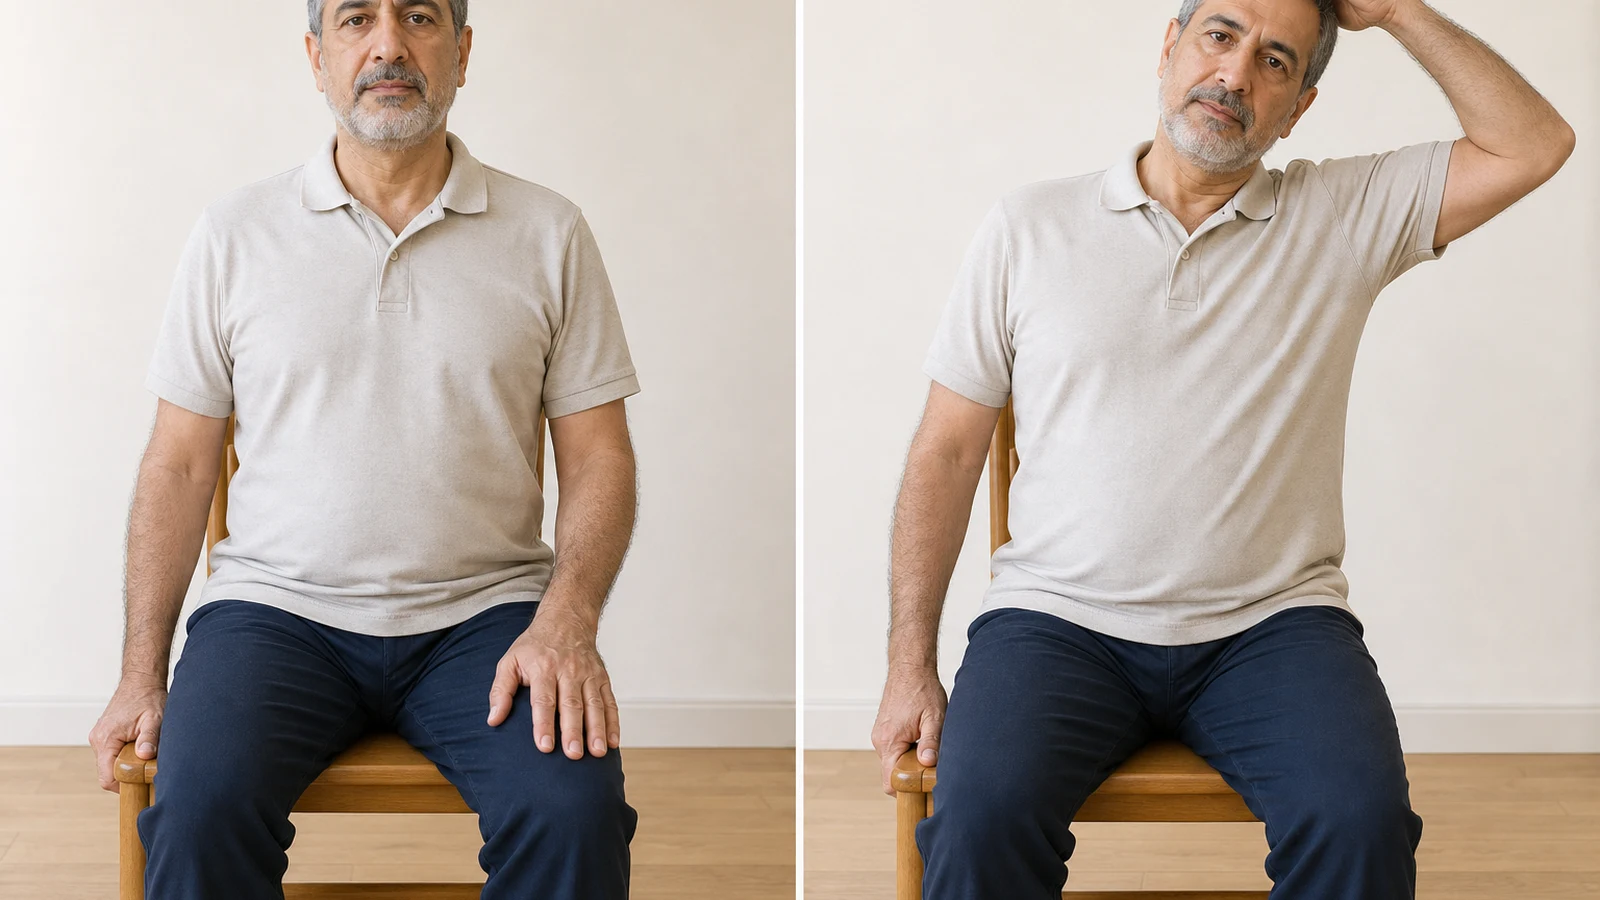
Gently tilt the head to one side until you feel a mild stretch at the top of the opposite shoulder. Hold for 30 seconds, 2 to 3 times for each side. Stop immediately with sharp pain or tingling.
More detailLess detail
Purpose and why it matters: the upper trapezius becomes short and tight with a raised shoulder; this stretch is a complement to the strengthening exercises, not a replacement for them.
Starting position: seated on a chair; keep the hand on the side being stretched under your thigh so that the shoulder does not lift.
Step by step:
- Tilt the head gently to the opposite side, as if you wanted to bring your ear toward your shoulder.
- With your free hand apply very gentle pressure; it should be a stretch, not pain.
- Stay in that position for 30 seconds and come back slowly.
Documented dose: 2 to 3 repetitions of 30 seconds for each side (the common range for static stretching).
Stop immediately if: sharp pain, tingling or numbness in the hand, or dizziness.
Common mistakes: pulling the head suddenly and hard; turning the neck at the same time; letting the opposite shoulder come up.
Easier version: without help from the hand, using only the weight of your own head.
Shoulder Blade Squeeze (Scapular Retraction)
Bring the two shoulder blades toward each other, as if you wanted to hold a pencil between them. 10 to 12 repetitions with a 5-second hold, 2 sets. Stop immediately with sharp pain between the shoulder blades or in the neck.
More detailLess detail
Purpose and why it matters: the muscles between the shoulder blades build a stable base for the neck; when they are weak the shoulders fall forward and the load on the neck joints increases.
Starting position: seated or standing with a straight back and arms by your sides; the chin slightly tucked.
Step by step:
- First let the shoulders drop down a little.
- Bring the two shoulder blades gently toward each other and hold for 5 seconds.
- Release slowly; keep the neck relaxed and the breathing free.
Documented dose: 10 to 12 repetitions, 2 sets, most days of the week.
Stop immediately if: sharp pain between the shoulder blades, in the neck, or any new symptom in the arm.
Common mistakes: shrugging the shoulders up instead of squeezing the blades together; arching the lower back; pushing the chin forward.
Easier version: a shorter 3-second hold with a smaller range.
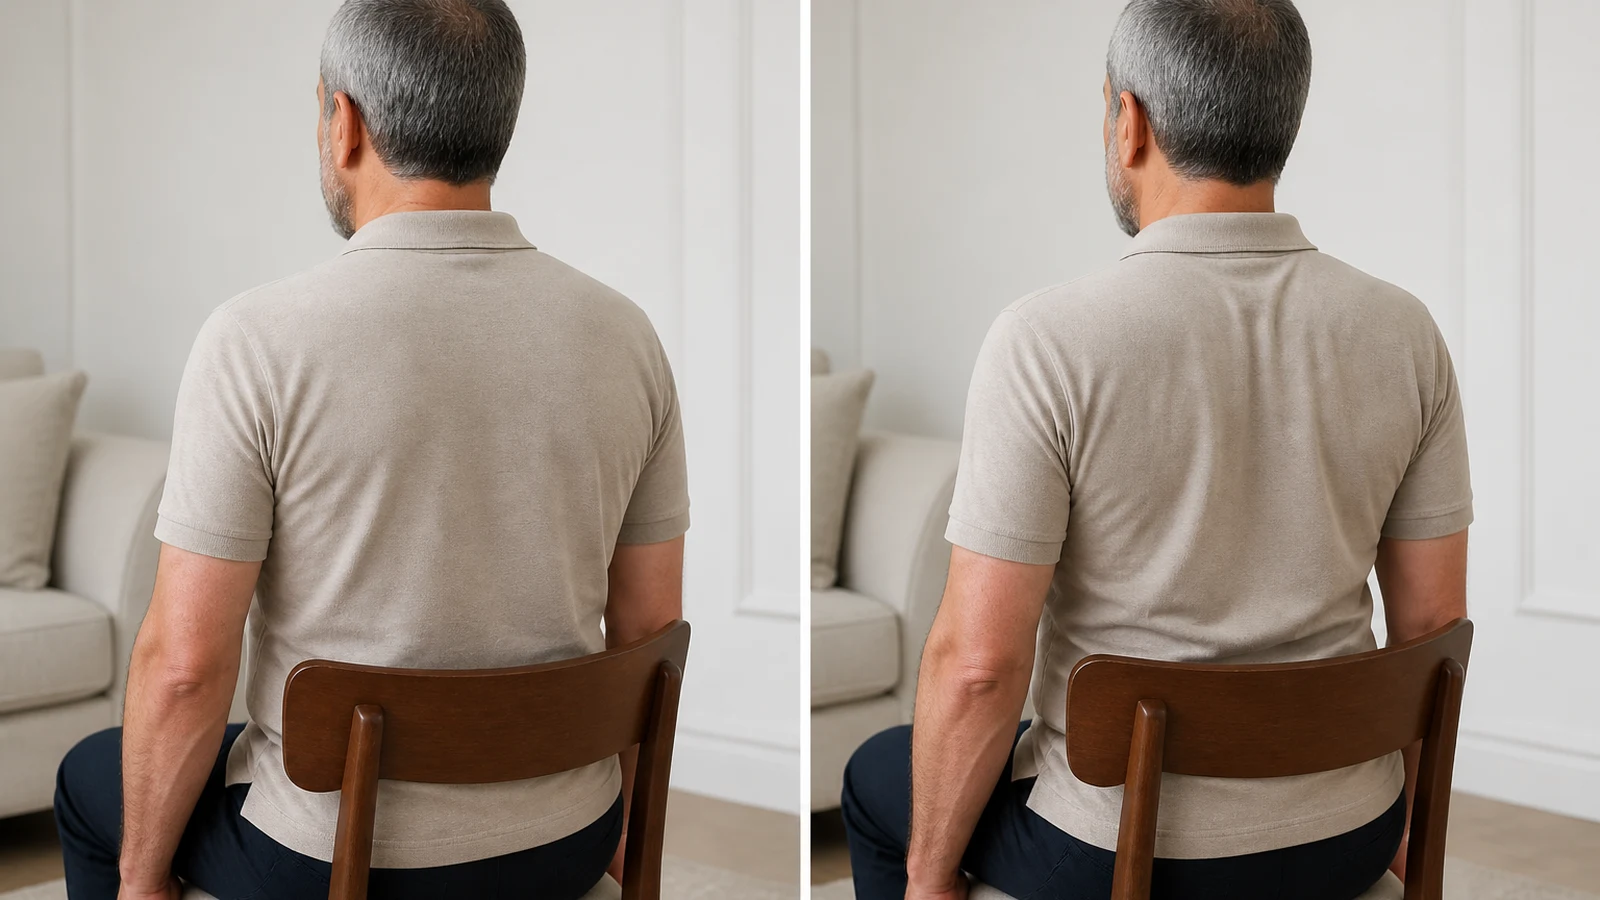
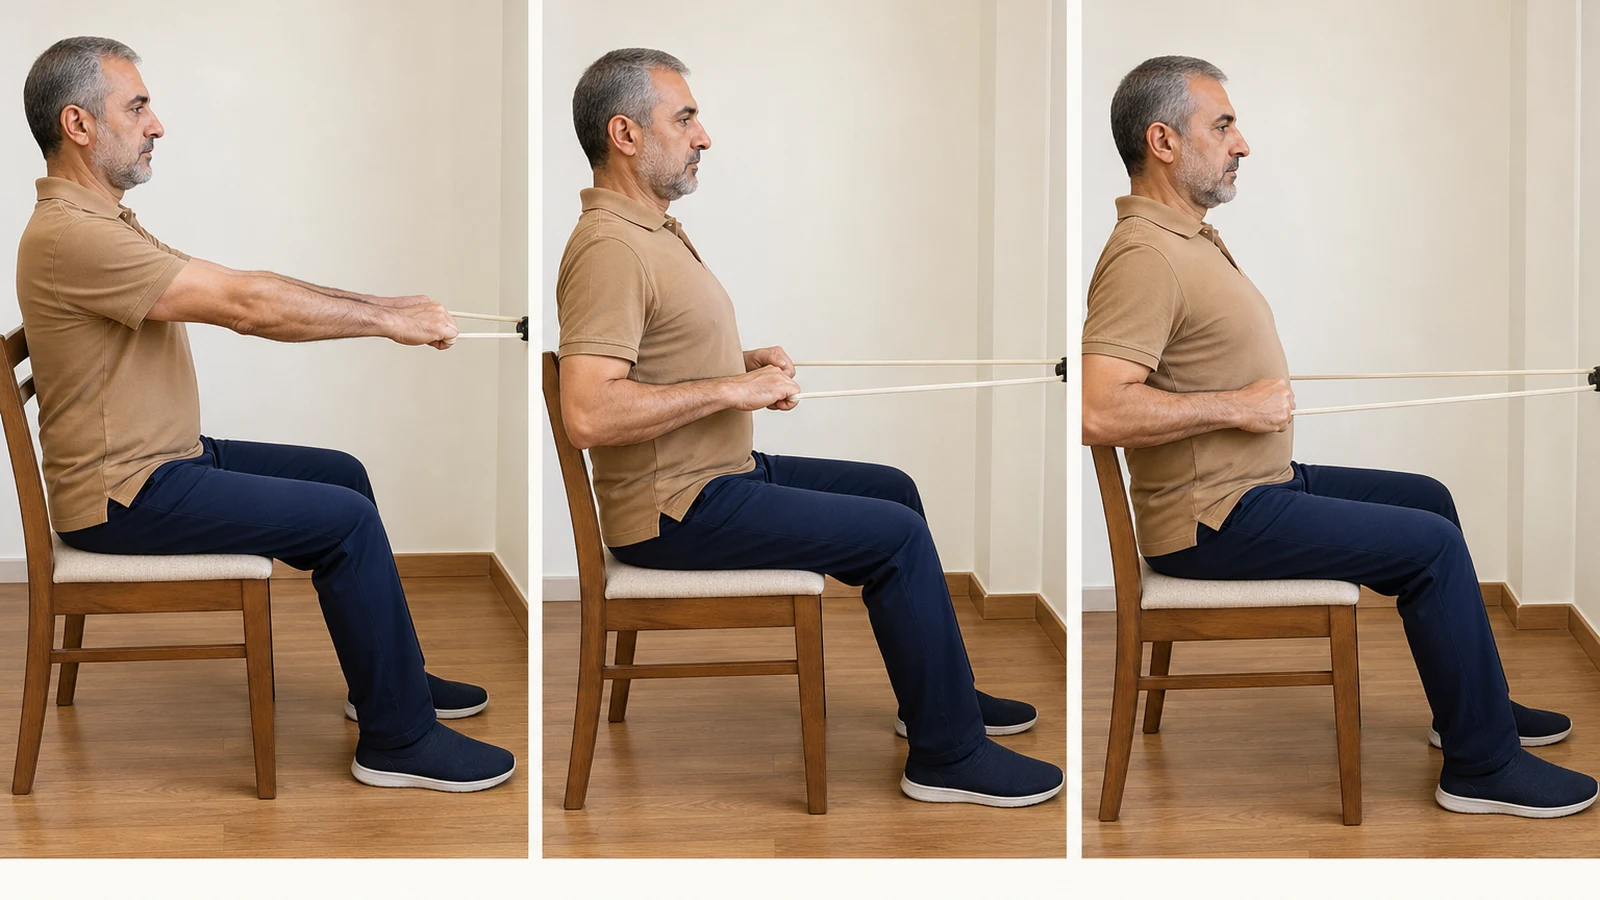
Band Row (Band Row)
The most effective exercise on this list: with an elastic band, pull the elbows back and squeeze the shoulder blades together. 10 to 12 repetitions, 2 to 3 sets, 3 days a week. Stop immediately with sharp neck or shoulder pain.
More detailLess detail
Purpose and why it matters: the evidence shows that strengthening the muscles of the neck, shoulder blade, and upper limb reduces chronic neck pain; at this age it also provides the resistance load that the bone needs.
Starting position: seated or standing; secure the band under your feet or around a door handle.
Step by step:
- First squeeze the shoulder blades together, then pull the elbows back and keep them close to your body.
- Pause for a moment at the end; the neck and shoulders must not lift and the breath must not be held.
- Return slowly and under control; the return should be slower than the pull.
Documented dose: 10 to 12 repetitions, 2 to 3 sets, 3 days a week (the common pattern for resistance training).
Stop immediately if: sharp neck or shoulder pain, tingling in the hand, or dizziness.
Common mistakes: pulling with the shoulder shrugged up; a band that is too stiff; the head coming forward; holding the breath.
Easier version: a thinner band or a shorter range.
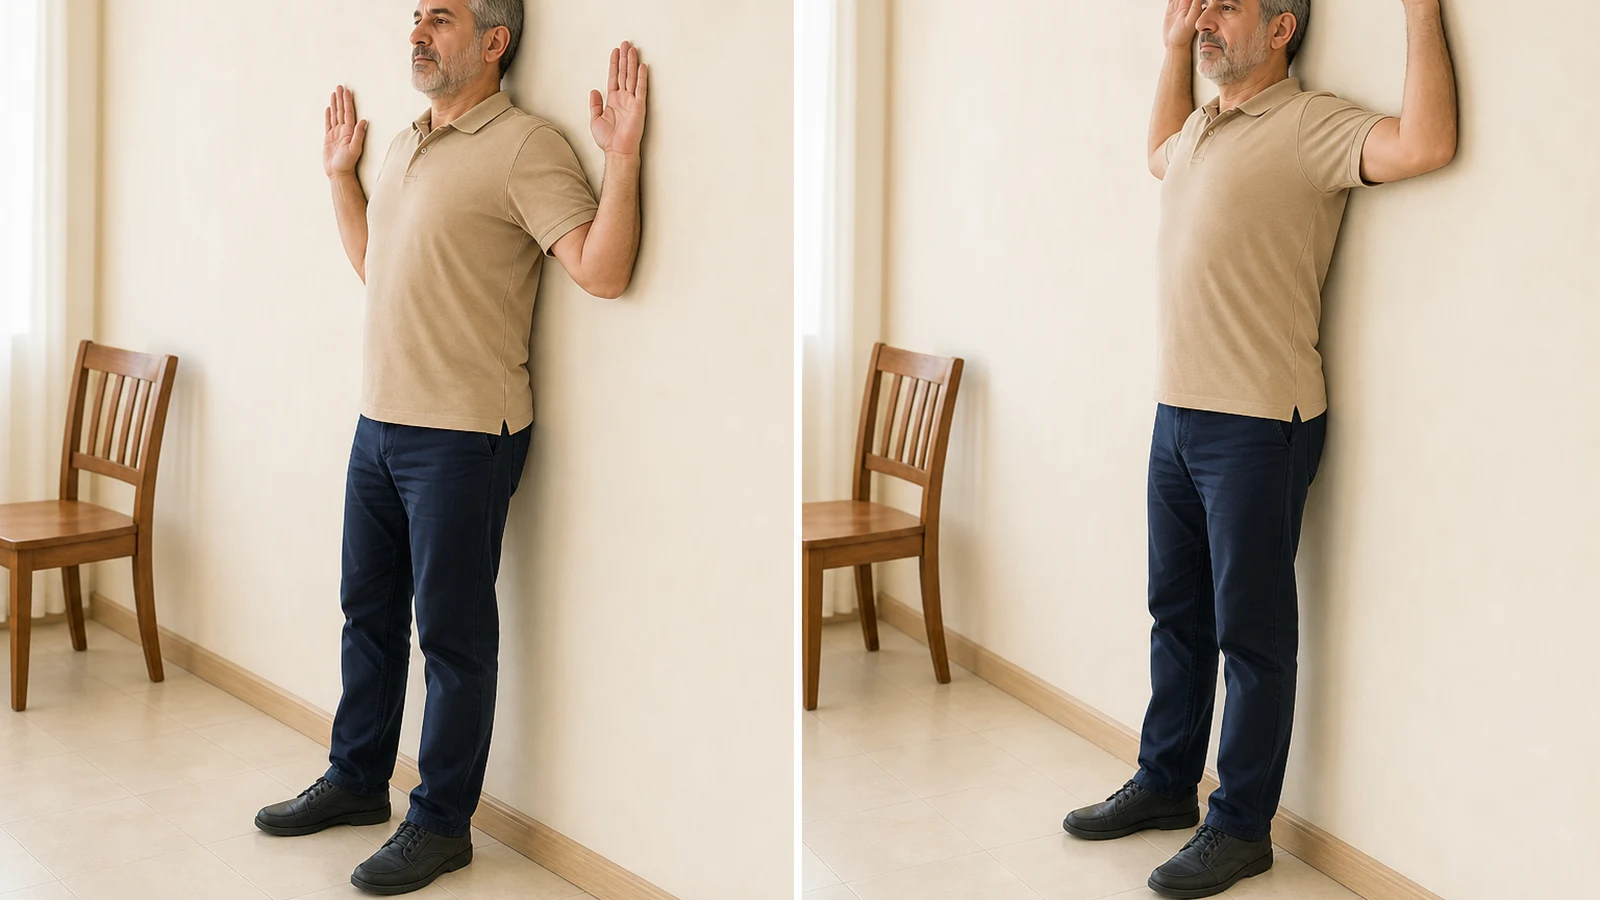
Wall Angel (Wall Angel)
With your back to the wall, move your arms slowly up and down in the "surrender" position without letting them leave the wall. 8 to 10 slow repetitions, 2 sets. Stop immediately with shoulder or neck pain.
More detailLess detail
Purpose and why it matters: this movement opens the chest and activates the shoulder blade muscles; it is the "opposite of your day" exercise.
Starting position: back to the wall, feet a little in front of your hips, the back of the head, the back, and the buttocks in contact with the wall.
Step by step:
- Bend the elbows to about 90 degrees and bring the backs of your hands close to the wall.
- Raise the arms slowly as far as the contact with the wall is maintained.
- Bring them down slowly; keep the neck neutral and the chin slightly tucked.
Documented dose: 8 to 10 repetitions, 2 sets, most days of the week.
Stop immediately if: sharp shoulder or neck pain, or a feeling of catching at the front of the shoulder.
Common mistakes: the lower back leaving the wall with too much arch; the arms going up with a shrugged shoulder; tipping the head back.
Easier version: a shorter range, or moving the feet further away from the wall.
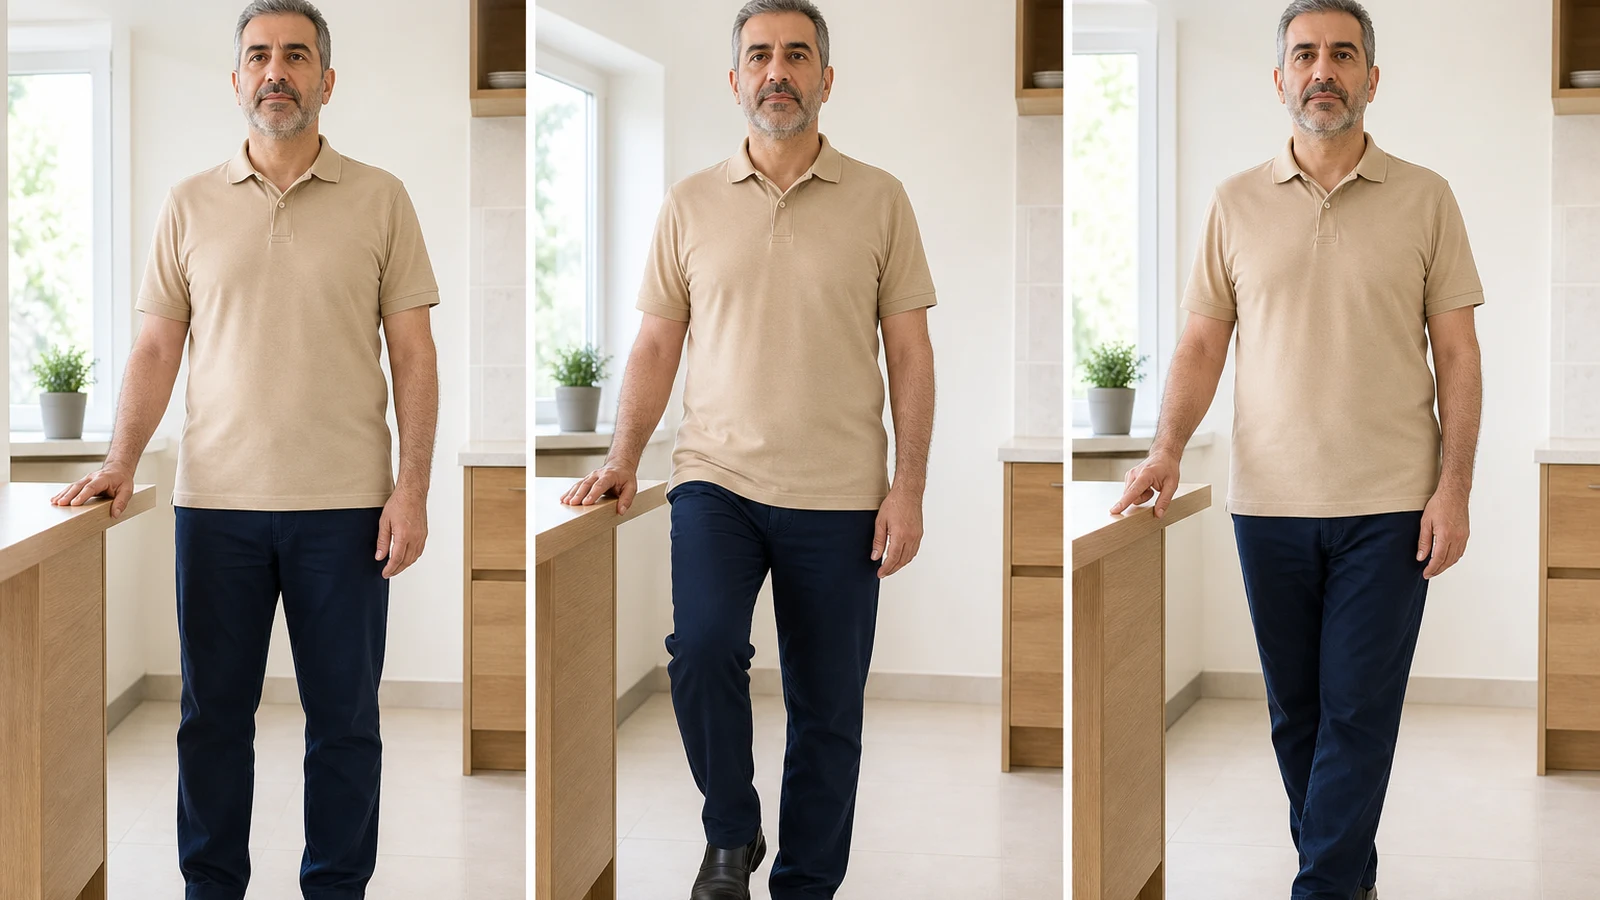
Supported Balance (Supported Balance)
Stand beside a firm table or chair, put your hand on the support, and practice standing on one leg. 3 repetitions of 10 to 30 seconds for each leg, most days of the week. Stop immediately with dizziness or unsteadiness.
More detailLess detail
Purpose and why it matters: the international bone health recommendations at this age put balance training alongside resistance training; preventing falls is the most important thing you can do for your vertebrae.
Starting position: beside a firm table or the back of a chair, on a non-slip surface.
Step by step:
- Put one or both hands on the support and shift your weight onto one leg.
- Lift the other foot slightly and hold for 10 to 30 seconds; keep looking forward and the neck neutral.
- Change legs; when it becomes easy, reduce the pressure of your hand — but always keep the support within reach.
Documented dose: 3 repetitions of 10 to 30 seconds for each leg, most days of the week (the common range for balance programs).
Stop immediately if: dizziness, a feeling of unsteadiness, or any new symptom in the arms or the legs.
Common mistakes: practicing without a support from the very beginning; looking at your feet instead of forward.
Easier version: standing with the two feet in one line (heel in front of toes) instead of standing on one leg.
Daily Walking (Daily Walking)
The simplest form of staying active, which the guidelines consider the core of treatment. Start with 10 to 15 minutes and build up to about 30 minutes on most days of the week. Stop immediately with dizziness or chest pain.
More detailLess detail
Purpose and why it matters: regular aerobic activity reduces sensitivity to pain and improves sleep; but it does not create the load the bone and the neck muscles need and it is not a replacement for resistance training.
Starting position: comfortable shoes, a flat and well-lit route, the phone in your pocket.
Step by step:
- In the first week, 10 to 15 minutes a day at a comfortable pace.
- Add a few minutes each week until you reach about 30 minutes.
- Raise the pace to the point where your breathing quickens but you can still talk.
Documented dose: about 30 minutes on most days of the week.
Stop immediately if: dizziness, chest pain, unusual shortness of breath, or a feeling of unsteadiness.
Common mistakes: walking with the neck bent over the phone; choosing an uneven or poorly lit route.
Easier version: several short 10-minute walks through the day.
4🏟️ Principles of training at the gym
In your version the gym is not forbidden; on the contrary, it is one of the best things you can do for your neck and your bones — provided the program is both resistance and balance work, not only the treadmill and the bike. What follows is not a set-by-set program; that is written by a trainer. With a history of osteoporosis or a vertebral fracture, check with your doctor before you start.
Warm-up and cool-down
Every session should begin with 5 to 10 minutes of light aerobic work, then a few repetitions of chin tucks, neck movement within a comfortable range, and wall angels. In a worn neck, a warm muscle makes the first set safe. End the session with a few minutes of walking and stretching too.
Choosing the weight and the rule for progressing
Start with machines, not free weights: the machine controls the path of the movement. Choose a weight that lets you do 10 to 12 repetitions with correct form, and make your progression over several weeks and in small steps — with the criterion that your neck is no stiffer the day after the session.
Form and breathing
The golden rule for the neck at the gym: head neutral, chin slightly tucked, shoulders down and back. Breathe out during the effort phase and do not hold your breath; holding the breath under a weight raises the blood pressure suddenly. If you turn your neck in order to see yourself, move the mirror, not the neck.
Order and structure of the session
Do rowing movements and strengthening between the shoulder blades earlier, where your form is better; leave overhead movements to the end or remove them. In a full-body program, legs and hips first, upper body next, and balance at the end.
High-risk patterns and their safe alternatives
Every "don't" has an alternative; removing the exercise altogether is not necessary:
- Shoulder press or lat pulldown behind the neck ← the same movement in front, with the shoulder blades squeezed and the neck neutral.
- Heavy dumbbell shrugs ← rowing and strengthening between the shoulder blades; your upper trapezius is already overworked as it is.
- Crunches with the hands laced behind the neck ← planks and trunk stability exercises, without pulling on the head.
- Jumping and impact movements ← controlled step-ups onto a low step, which build both strength and balance.
- Heavy overhead weight while standing ← a seated press with a backrest, which keeps the spine and the neck supported.
Manage the bad day, don't cancel it
On days when the neck is stiffer, halve the session rather than cancel it: reduce the weight, take out the overhead movements, and work on rowing and shoulder blade exercises. Cancelling completely is only right when the pain is sharp or a symptom travels into the arm.
A weekly template
2 to 3 resistance sessions a week with a focus on the back, shoulder blade, and shoulder, plus balance training on most days and walking, is a sensible template for this age; leave at least one day between two resistance sessions. The neck exercises in this article carry a light load and can be continued every day.
Signs to stop at the gym
Stop the set at that very moment if: sharp neck pain, shooting or tingling into the arm, numbness, dizziness or blurred vision, or a headache that starts with one particular movement. Carrying on "just to finish the set" costs you several weeks of training.
5⚠️ Warning signs — see a doctor immediately
These signs mean: close the article and get seen today:
- Neck pain after a blow, an accident, or a fall
- Weakness or numbness of the hands, especially if it is progressive
- New clumsiness of the hands (dropping objects, difficulty with buttons) or loss of balance while walking — a possible sign of pressure on the spinal cord
- Loss of bladder or bowel control
- Fever, chills, or persistent night pain that does not settle with a change of position
- Unexplained weight loss or a history of cancer
- Severe dizziness, double vision, or difficulty speaking
6✅ Summary and next step
Wear-related changes of the neck are normal at your age; what determines the quality of your days is your everyday habits and your exercise program. Take three things seriously: correct the layout of your work, your glasses, and your pillow; strengthen the muscles of the neck, shoulder blade, and shoulder two or three times a week and put balance training alongside it; and review the state of your bones with your doctor. Stretching alone is not enough, and prolonged rest makes the situation worse; if the pain has not improved after several weeks or a symptom has travelled into the arm, an examination is needed.
If your neck pain is not getting better with this program, or you are worried about the stiffness, the headaches, and the state of your bones, book an appointment for a personal assessment.
To learn more about this area of treatment, see the spine page.
Related guides: Service page: Non-Surgical Spine Care · Also related: Low back pain
This content has been prepared purely for general education and is not a substitute for an examination and the opinion of your own doctor. If you have any of the warning signs above, or your pain has not improved with these adjustments over several weeks, get examined before you continue the exercises. Adjust the intensity and the type of exercise to your own particular situation and to the opinion of your care team.
View the scientific sources
- Blanpied PR, et al. Neck Pain: Revision 2017. Clinical Practice Guidelines. J Orthop Sports Phys Ther. 2017. doi.org/10.2519/jospt.2017.0302
- El-Allawy A, et al. Clinical Practice Guideline: Nonspecific Neck Pain. Dtsch Arztebl Int. 2025. doi.org/10.3238/arztebl.m2025.0119
- Gross A, et al. Exercises for mechanical neck disorders. Cochrane Database Syst Rev. 2015. doi.org/10.1002/14651858.CD004250.pub5
- Bini P, et al. The effectiveness of manual and exercise therapy on headache intensity and frequency among patients with cervicogenic headache: a systematic review and meta-analysis. Chiropr Man Therap. 2022. doi.org/10.1186/s12998-022-00459-9
- Giangregorio LM, et al. Too Fit To Fracture: exercise recommendations for individuals with osteoporosis or osteoporotic vertebral fracture. Osteoporos Int. 2014. doi.org/10.1007/s00198-013-2523-2

Dr. Jalil Emad
Orthopedic specialist and surgeon, board-certified in bone and joint surgery; years of experience in knee and hip replacement, sports injuries and arthroscopy in Isfahan.
Related articles
Low back pain
Explore daily habits and exercise choices for low back pain. Read each guide's description; suitable exercise depends on your symptoms and assessment.
Hydrotherapy for the Low Back: Twenty Aquatic Exercises for Chronic Back Pain
Learn 20 aquatic exercises for low back pain, with water depths, movement instructions and pool safety, guided by your physiotherapy plan.
Total Knee Replacement Surgery: Postoperative Care and Rehabilitation
Read knee replacement recovery step by step, from wound care and medicines to exercise. Progress depends on pain, swelling and movement.